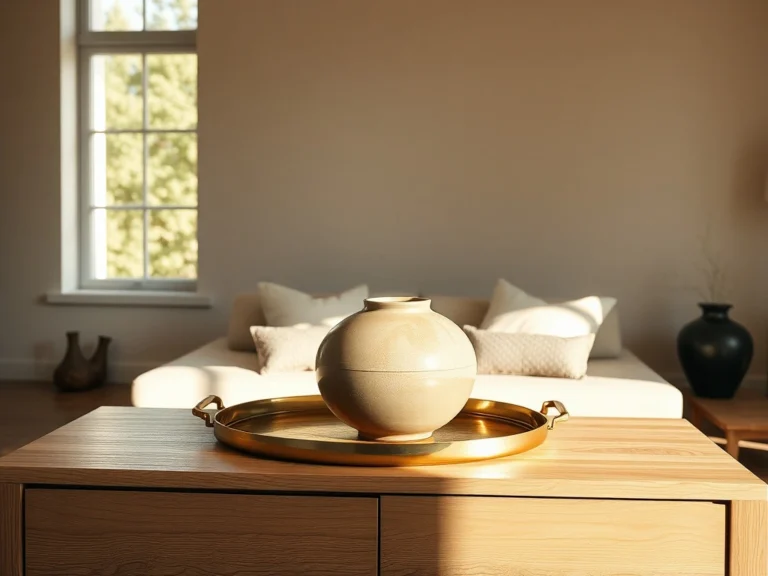
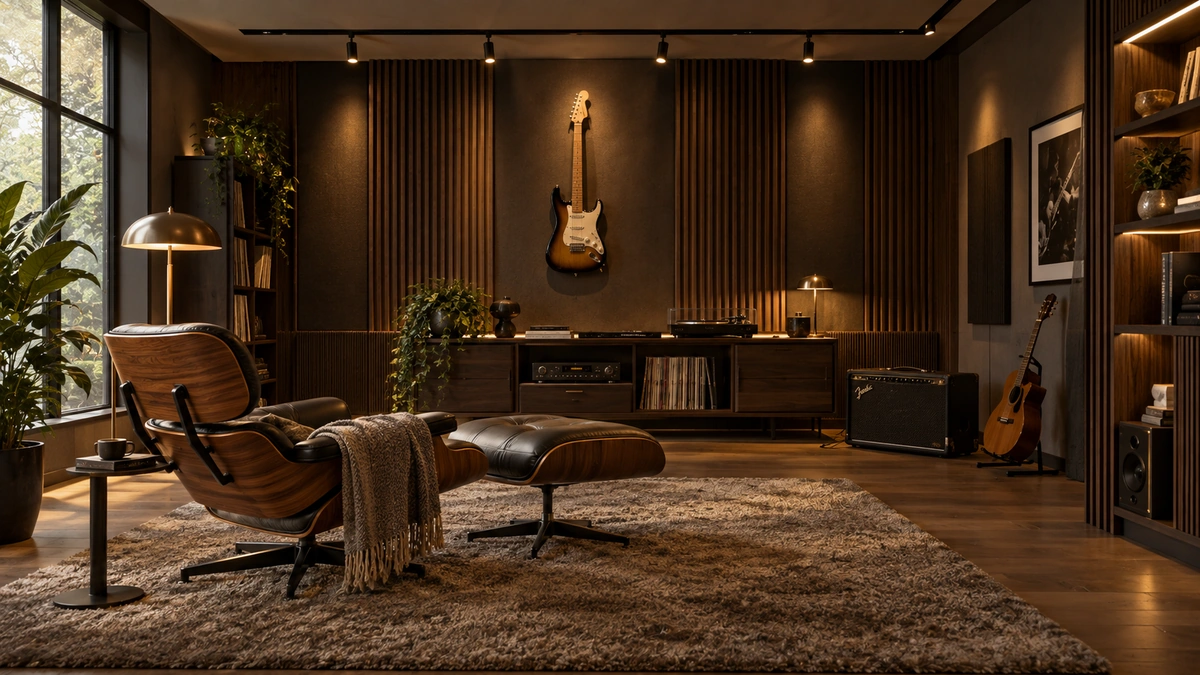
A dedicated music room is more than just a place to store instruments; it is a personal sanctuary where creative expression meets the practical demands of acoustic performance. Finding the balance between professional-grade equipment and a refined, inviting home environment can feel daunting, especially when cables, bulky hardware, and soundproofing requirements threaten to disrupt your interior aesthetic.
The secret to a successful space lies in layering functional design with intentional style. Whether you are transforming a small nook or a sprawling studio, your music room decor ideas should prioritize both the longevity of your instruments and the atmosphere of your home. By treating acoustic treatments as art and integrating smart storage solutions, you can create a soundstage that feels as curated as it is high-performing.
In the following guide, we will explore how to harmonize professional sound management with elevated interior design. From selecting the right lighting for detail-oriented tasks to styling your collection as a focal point, these strategies will help you build a sophisticated environment that inspires your best work while seamlessly complementing your home.
Integrating Acoustic Panels as Statement Wall Art
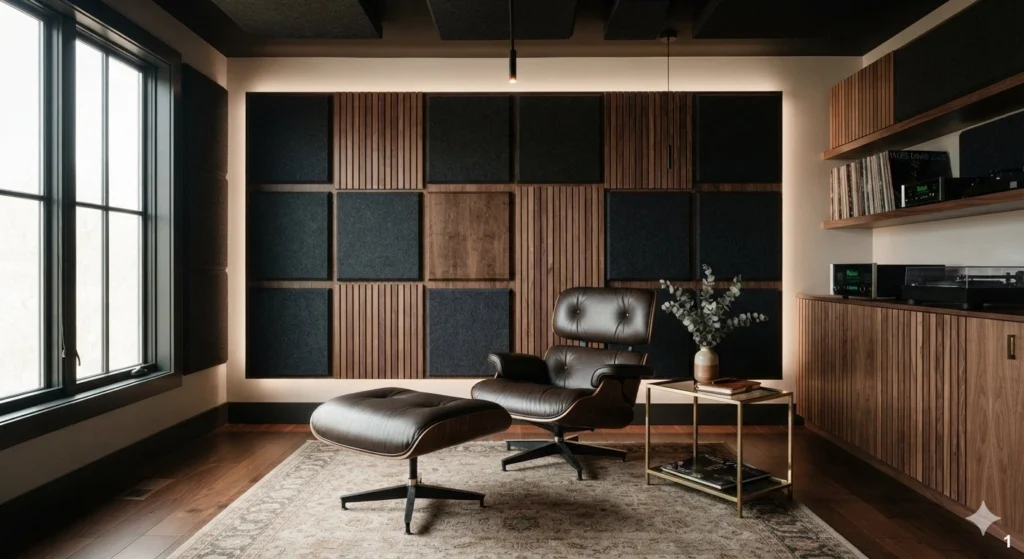
Gone are the days when acoustic treatment meant unattractive foam squares tacked to the wall. Today, high-end acoustic panels act as architectural canvases, blending essential sound absorption with sophisticated interior design. By selecting fabric-wrapped panels in deep, moody hues or geometric wood-slat configurations, you can transform a functional necessity into the room’s primary focal point.
These panels work best on the primary wall facing your listening position or behind your instrument setup to minimize echo and flutter. For a truly curated look, consider a gallery-style arrangement where panels of varying sizes and textures are grouped together. Pair soft, felt-based panels with natural walnut slats to introduce warmth and organic movement to the space.
One common mistake is over-treating a room, which can lead to a ‘dead’ sound that feels unnatural and claustrophobic. Instead, aim for balance by alternating soft fabric panels with reflective surfaces like glass or polished wood. To elevate the aesthetic, opt for custom-commissioned panels that mirror the color palette of your upholstery. Remember to ensure that the fabric used is acoustically transparent, allowing sound waves to pass through to the core material for effective dampening. When placed correctly, these panels do more than just refine the acoustics; they provide a structural rhythm that grounds the entire design scheme, making the music room feel like a professional studio that belongs in a luxury home.
Selecting Ergonomic Furniture for Extended Practice Sessions
When you are deep in a creative flow, the last thing you want is physical discomfort. Selecting the right seating is paramount to both your health and your performance quality. Look for chairs that provide robust lumbar support while maintaining a slim, sculptural profile that doesn’t overwhelm the room. A mid-century modern leather lounge chair or a sleek, height-adjustable stool with a contoured seat is often the perfect marriage of form and function.
Placement is key; ensure your chair allows for a natural posture relative to your instrument, whether that is a piano, guitar, or a digital workstation. For guitarists, look for armless chairs to allow for full range of motion. For those at a desk, invest in a high-quality task chair that can be tucked away when not in use. Material choice matters—leathers develop a beautiful patina over time, while performance fabrics offer durability against wear and tear.
Avoid bulky, office-style chairs that look out of place in a residential setting. Instead, prioritize pieces that feel like high-end furniture rather than utilitarian equipment. If you have the space, a small velvet-upholstered ottoman provides a spot to rest your feet during long sessions without sacrificing style. Always test the seat height against your instrument; a chair that is too low or too high can cause long-term strain, hindering your ability to play for extended periods. By investing in ergonomic pieces that align with your overall decor, you ensure that your music room remains a sanctuary for both your body and your craft.
Designing Professional Instrument Displays for Visual Impact
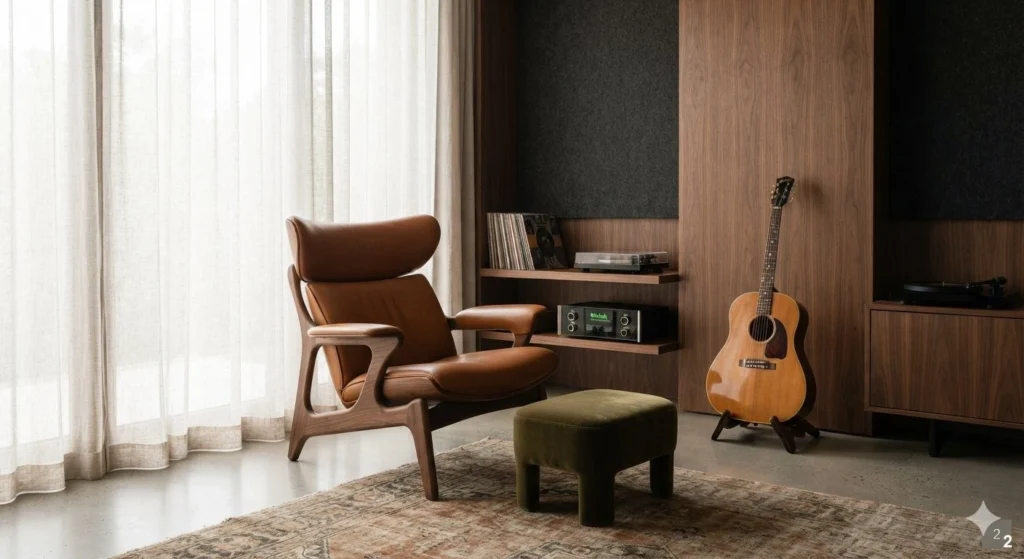
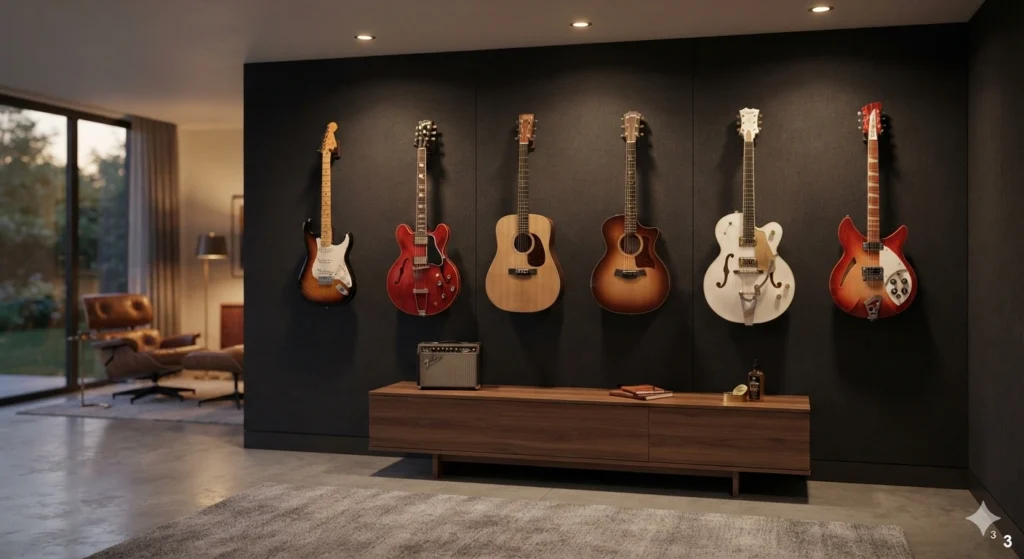
Your instruments are works of art, and they deserve to be displayed with the same reverence you would afford a sculpture or a painting. Rather than hiding guitars or violins in cases, utilize wall-mounted hangers or floor stands that highlight their craftsmanship. The key to a sophisticated display is intentionality—don’t just hang instruments randomly. Create a symmetrical arrangement on a dedicated wall or use a floor-to-ceiling rack that acts as a room divider.
Consider the lighting in your display area. A subtle, recessed spotlight directed toward a prized guitar or a standing harp can create a dramatic museum-like effect. When mounting instruments, ensure the wall hardware is anchored securely and utilize felt-lined hooks to prevent scratches. If you live in an area with fluctuating humidity, consider installing a discrete, wall-mounted humidification system near your display to protect the wood of your instruments from warping or cracking.
Avoid cluttering the wall with too many items; leave ‘breathing room’ between instruments to let each one shine. If you are displaying a collection, group them by type or color to create visual cohesion. For a truly elevated look, place a small, low-profile console table beneath your wall-mounted instruments to hold picks, tuners, and cleaning cloths. This keeps essential accessories within reach while grounding the display visually. By treating your instruments as pieces of a curated collection, you turn your music room into an inspiring space that reflects your personal journey and artistic passion.
Implementing Hidden Cable Management for a Clean Aesthetic
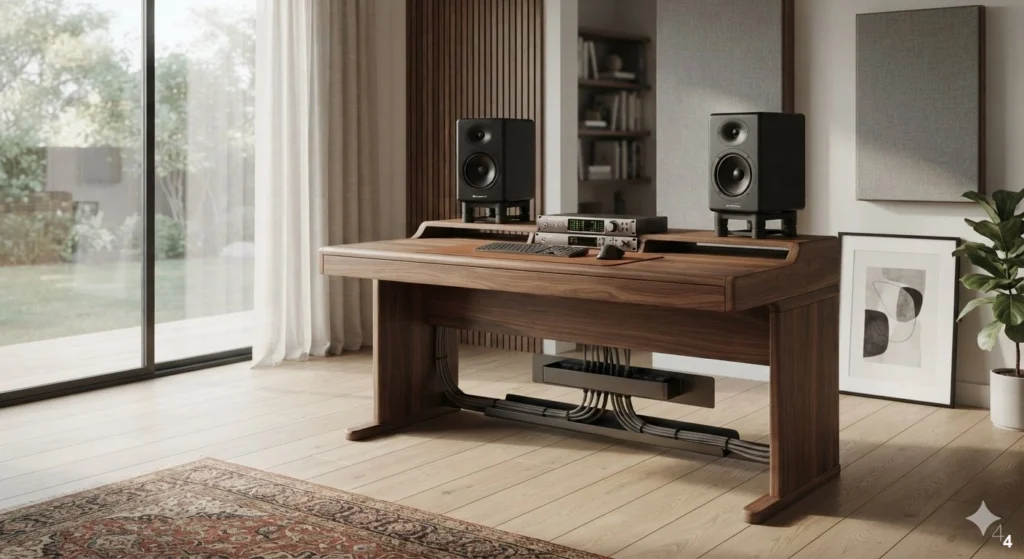
Nothing shatters the tranquility of a beautiful space faster than a ‘spaghetti nest’ of tangled cables. In a music room, where multiple devices, amps, and recording interfaces are common, cable management is a non-negotiable element of design. The goal is to make the technology feel integrated rather than intrusive. Start by utilizing furniture with built-in cord channels or hidden rear compartments to house power strips and excess wiring.
For floor-based cables, invest in high-quality, fabric-covered cable sleeves that match your flooring or baseboards. These sleeves disappear into the background while keeping cords bundled neatly. If your music room features a central workstation, use under-desk cable trays to lift everything off the floor. This not only cleans up the visual line but also makes cleaning the room significantly easier. Always label your cables at both ends—a simple pro-tip that saves immense frustration when you need to troubleshoot your setup.
Avoid using cheap plastic zip ties that can damage cable jackets over time. Instead, opt for Velcro straps, which are reusable, gentle on equipment, and easy to adjust as your gear evolves. If you have permanent wall-mounted speakers or monitors, consider running cables through the wall itself for a completely seamless look. When cables are hidden, the eye is free to appreciate the architecture, the instruments, and the overall design of the room. A clean, wire-free environment promotes mental clarity, allowing you to focus entirely on the music rather than the mess of equipment that produces it.
Layering Ambient and Task Lighting for Optimal Visibility
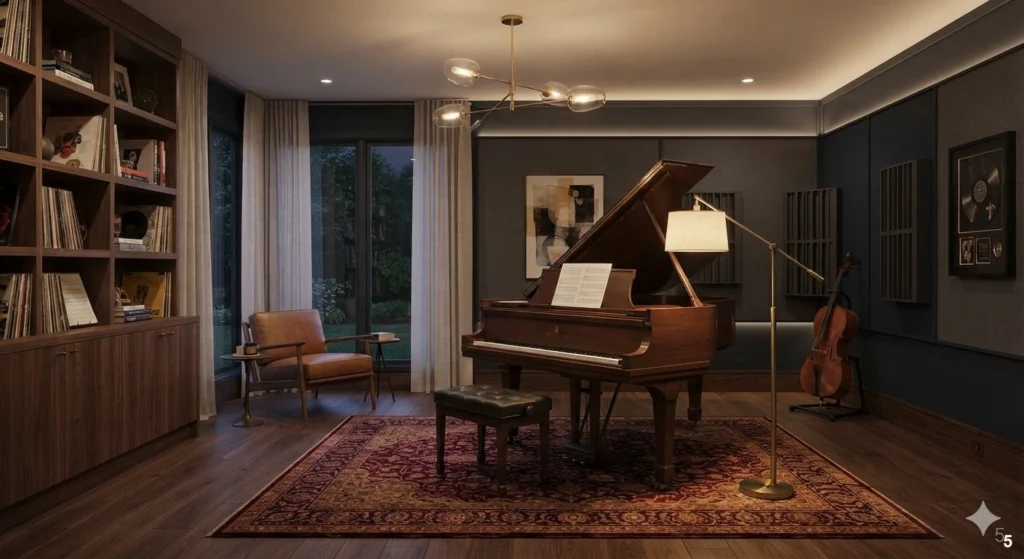
Lighting in a music room must serve a dual purpose: it needs to be cozy enough for creative exploration and bright enough for reading complex sheet music. A layered approach is the only way to achieve this. Start with a foundation of dimmable recessed lighting or a statement chandelier to provide general ambient light. This allows you to set the tone of the room, whether you are hosting a small jam session or enjoying a solo listening hour.
Next, incorporate task lighting specifically for your instruments or music stands. A sleek, adjustable brass floor lamp next to your piano or a dedicated clip-on LED light for your music stand ensures you can read notes without straining your eyes. Avoid harsh, overhead fluorescent lighting, which can feel clinical and draining. Instead, lean into warm, high-CRI (Color Rendering Index) bulbs that accurately represent colors and textures, making your space feel inviting and vibrant.
Consider adding accent lighting, such as LED strips hidden behind acoustic panels or under shelves, to create a subtle glow that emphasizes the room’s architecture. This adds depth and dimension, preventing the space from feeling flat. A common mistake is relying on a single light source; this creates harsh shadows and makes the room feel small. By layering these different types of light, you gain total control over the atmosphere. If you want to take it a step further, integrate a smart lighting system that allows you to save ‘scenes’—one for practice, one for recording, and one for relaxing—making the room as versatile as the music you create within it.
Utilizing Bass Traps as Architectural Features
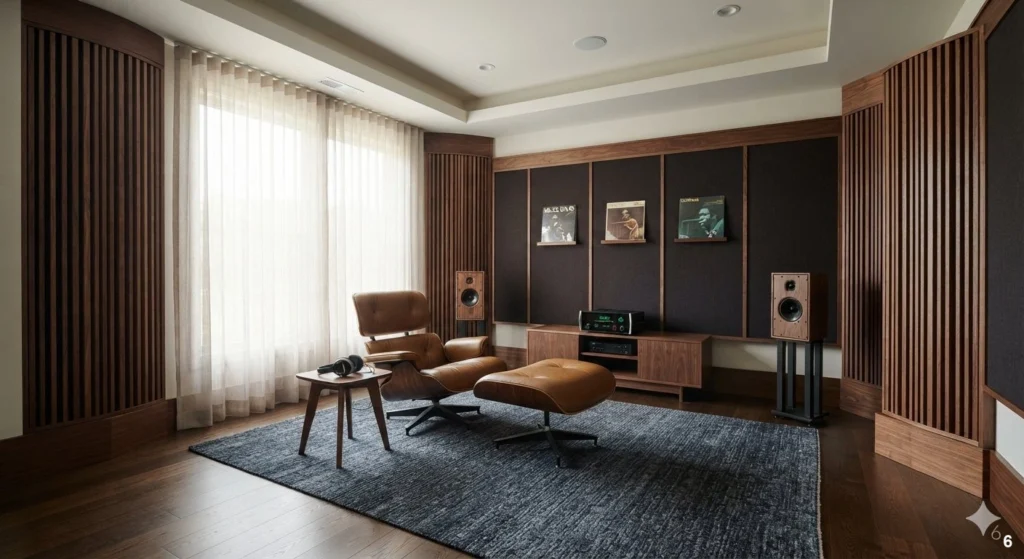
Bass traps are essential for taming low-frequency energy in a room, preventing the ‘muddy’ sound that often plagues small spaces. While they are usually seen as bulky, utilitarian necessities, you can easily integrate them as clever architectural features. Instead of hiding them in corners, wrap them in high-end textiles or custom timber slats to match your existing millwork. By treating them as part of the room’s ‘built-in’ cabinetry, they become an intentional design element rather than an afterthought.
For a seamless look, consider floor-to-ceiling bass traps that mimic the appearance of corner columns or pilasters. This adds a sense of height and structural elegance to the room. If your aesthetic is more modern and minimalist, opt for fabric-covered traps in a color that matches your walls, allowing them to blend into the perimeter. If you prefer a bolder approach, use contrasting textures or wood finishes to highlight these corners as deliberate design statements.
Avoid placing other heavy furniture directly in front of your bass traps, as this can block their effectiveness. They need to be positioned in corners where low-frequency pressure is highest. To elevate the look, you can even top them with small, decorative accents like a plant or a sculptural vase, provided the item doesn’t interfere with the acoustic function. By elevating the humble bass trap into a decorative column, you solve a major acoustic problem while simultaneously adding character and architectural interest to your space. This approach proves that you don’t have to sacrifice high-end aesthetics to achieve professional-grade sound control in your home.
Choosing Color Palettes That Enhance Focus and Creativity
The color palette of your music room should reflect the mood you want to cultivate. For a space dedicated to serious practice and composition, deep, saturated colors like navy, charcoal, or forest green are excellent choices. These colors absorb light, reducing distractions and creating a ‘cocoon’ effect that encourages deep focus and immersion. They also provide a beautiful backdrop that makes wood-toned instruments and metallic hardware pop.
If your music room is a place for lighter, more upbeat creative energy, consider a palette of warm, earthy neutrals. Creamy whites, soft terracottas, and muted ochres create an inviting, sun-drenched atmosphere that feels fresh and inspiring. These colors work exceptionally well in multi-purpose spaces, as they transition seamlessly from a music room to a home office or library. Use your accent colors to inject personality—think deep bronze, brushed gold, or rich leather tones that complement the natural materials of your gear.
A common mistake is choosing colors that are too bright or high-contrast, which can feel overstimulating and distracting during long sessions. Instead, aim for a cohesive, monochromatic base with subtle tonal variations. This keeps the room feeling calm and intentional. Remember that acoustics and color can work together; darker, heavier fabrics used for acoustic treatments can also serve as your primary color anchors. When selecting your palette, test paint swatches or fabric samples at different times of the day to see how they interact with your lighting. A well-chosen color scheme doesn’t just look good; it sets the psychological stage for your best creative work.
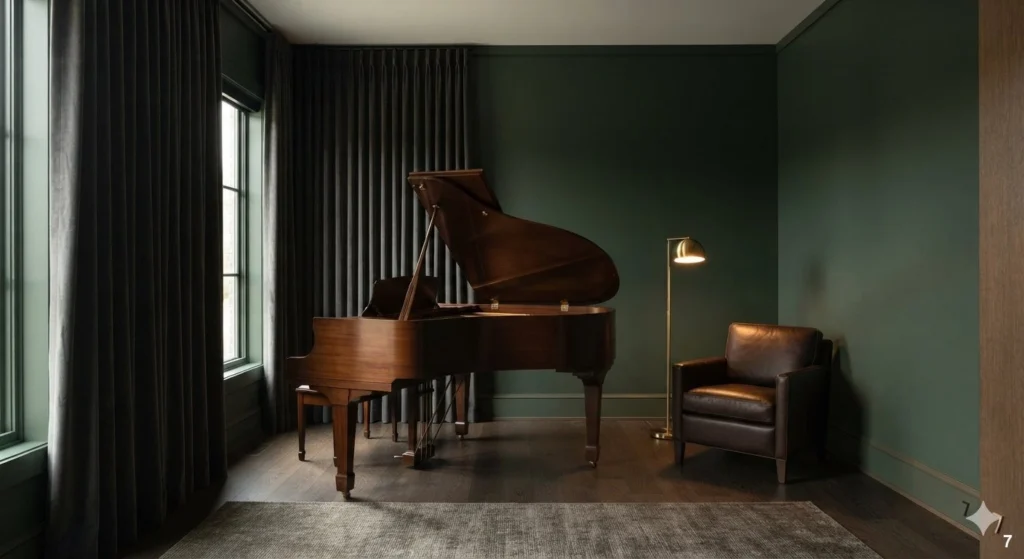
Creating a Dedicated Nook for Sheet Music and Tablet Storage
The physical clutter of sheet music and devices can quickly overwhelm a space. To maintain a high-end look, you need a dedicated, organized home for these essentials. Instead of a standard filing cabinet, look for bespoke built-in shelving or a sleek sideboard with closed storage. This keeps your scores, tablets, and chargers out of sight when not in use, preserving the serene aesthetic of the room.
For a more accessible approach, use open shelving designed for vertical filing. Custom-sized dividers help keep sheet music upright and organized by genre or composer, preventing the dreaded ‘stack of paper’ pile-up. If you use tablets for digital scores, incorporate a charging station into a drawer or a hidden cubby. This ensures your devices are always powered and ready, without the mess of tangled charging cables cluttering your workspace.
Use high-quality materials for your storage—think leather-bound storage boxes, velvet-lined drawers, or glass-fronted cabinets that showcase your music library as a decorative feature. This elevates the functional storage into part of the room’s luxury narrative. A common mistake is underestimating the volume of paper music; always plan for more storage than you think you need. To add a designer touch, label your storage sections with elegant brass or leather tags. By creating a specific ‘home’ for your music and tech, you ensure that your room stays clean and functional, allowing you to transition from inspiration to execution without the visual friction of clutter. This level of organization is what separates a hobby space from a truly professional-grade sanctuary.
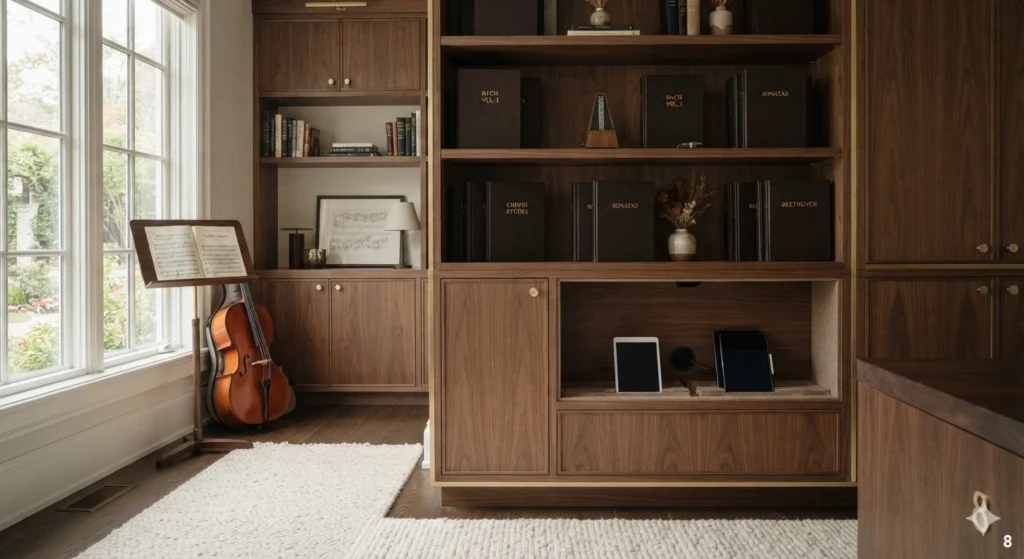
Incorporating Luxury Textiles for Sound Absorption
Acoustic treatment doesn’t have to mean unsightly foam panels. By integrating heavy, tactile textiles, you can significantly dampen sound reflections while adding a layer of sophisticated comfort. Think of your music room as a sensory experience; plush velvets, heavy linens, and thick wool tapestries work wonders for softening high-frequency echoes. Wall-mounted fabric panels wrapped in high-end bouclé or mohair create a gallery-like appearance while serving a vital functional purpose.
This approach works best in rooms with hard surfaces like hardwood floors or vaulted ceilings, where sound tends to bounce aggressively. For a seamless look, choose textiles in deep, moody palettes like charcoal, navy, or espresso to ground the space. You might consider an upholstered wall behind your piano or drum kit, which acts as a massive sound absorber while providing a dramatic focal point. Avoid thin, synthetic fabrics that lack the density required for true diffusion; always opt for natural fibers with a heavy weave.
Lighting plays a key role here as well. Install soft, recessed wall washing to highlight the texture of your fabric panels, creating a warm, cinematic glow. The goal is to make the room feel like a private lounge rather than a sterile studio. By treating the walls as part of your decor strategy, you ensure the space remains beautiful even when the instruments are tucked away.
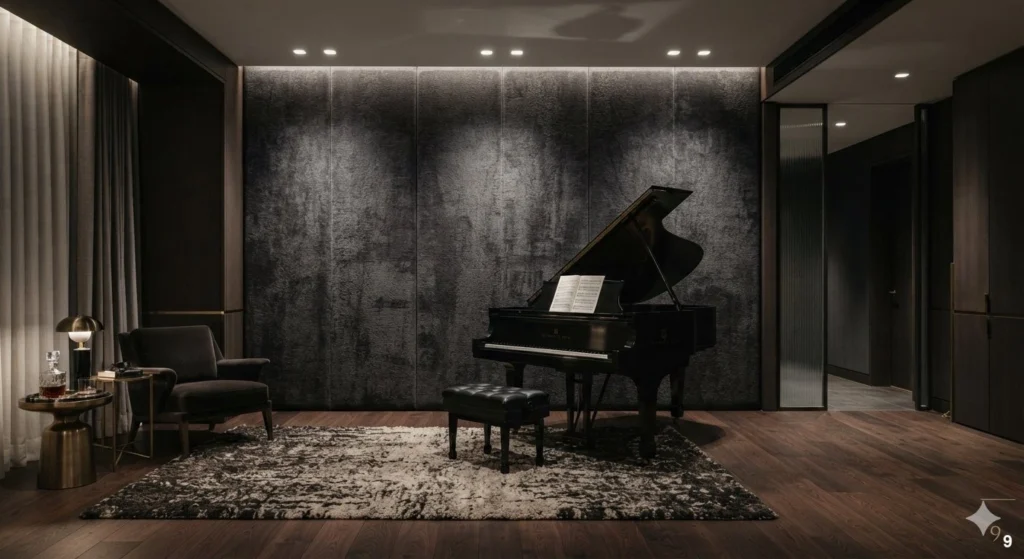
Designing a Multi-Purpose Listening Room Layout
Creating a room that functions as both a serene listening lounge and a high-performance practice space requires a thoughtful, zoning-based layout. Start by anchoring the room with a pair of high-quality armchairs arranged toward your audio system or primary instrument. This creates a dedicated ‘auditory zone’ that feels distinct from the rest of the home. Use a low-profile console to house your receiver and vinyl collection, keeping equipment neatly tucked away to avoid visual noise.
This layout works best in open-plan homes or flex rooms where you need to transition from a focused studio environment to a relaxed living area. To maintain a clean aesthetic, opt for multifunctional furniture, such as a leather ottoman that provides hidden storage for cables and cleaning kits. Avoid overcrowding the center of the room, as open space is essential for balanced acoustics and fluid movement during practice sessions.
When it comes to lighting, layer your illumination to suit the mood. Incorporate a dimmable floor lamp with a warm brass finish for reading scores, alongside recessed lighting on a dimmer switch for when you are simply enjoying a record. If the room doubles as a guest space, choose a sofa bed with a sleek, low-slung silhouette that doesn’t compromise the room’s refined character. By keeping the floor footprint light and airy, you ensure the room feels curated rather than cluttered, allowing the music to remain the true centerpiece of the design.
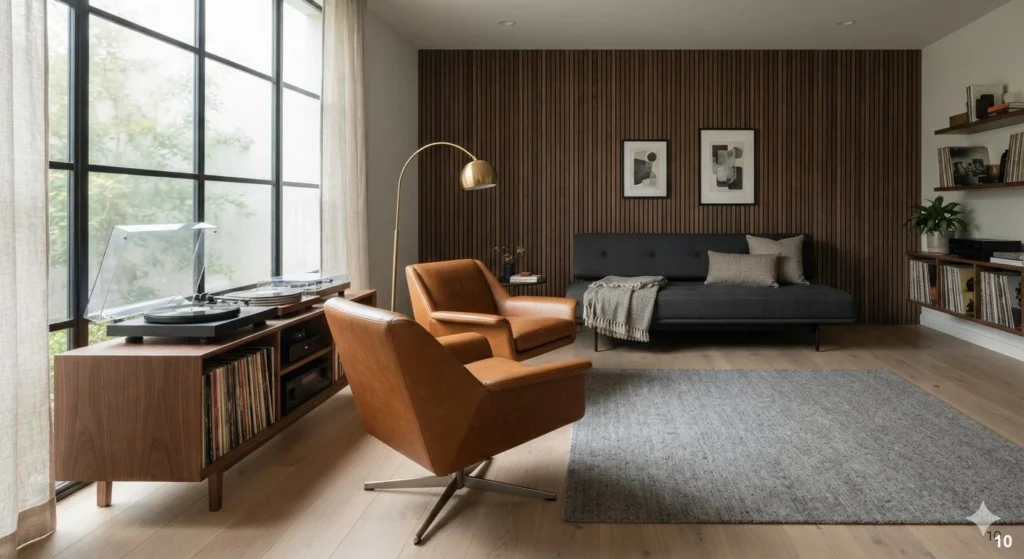
Protecting Sensitive Instruments with Climate Control Decor
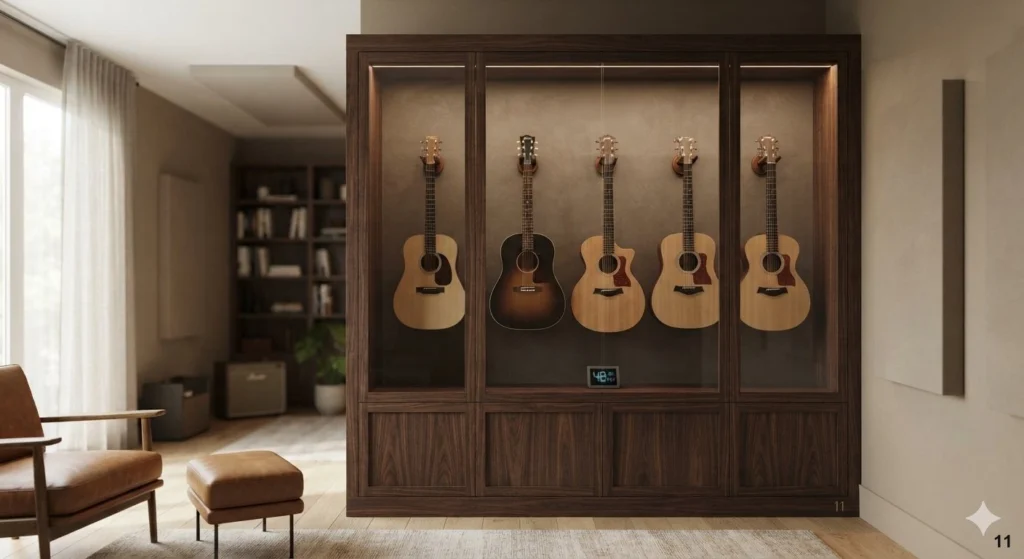
Fine instruments, particularly wooden ones like guitars and violins, are highly susceptible to fluctuations in humidity and temperature. Integrating climate control into your decor is not just about protection; it is about preservation. Consider incorporating a sleek, dedicated hygrometer into a display cabinet or near your instrument wall mount to keep a constant eye on the environment. Decorative humidifiers that resemble high-end ceramic sculptures can blend seamlessly into your design while maintaining the ideal 45-55% humidity range.
This strategy is essential for any room that experiences direct sunlight or proximity to exterior walls. Position your instruments on interior walls whenever possible, as these areas are less prone to extreme temperature swings. Avoid placing expensive gear near HVAC vents, fireplaces, or drafty windows, which can cause wood to warp or crack over time. A common mistake is to over-clutter the wall; instead, treat each instrument as a piece of art, spaced appropriately to allow for airflow.
For a designer touch, install custom built-in cabinetry with integrated glass displays that feature internal climate monitoring. Use wood tones that complement the finish of your instruments—dark walnut or warm oak provides a timeless, elegant backdrop. Proper lighting inside these cabinets should be UV-filtered LEDs to prevent fading or heat damage. By making climate control a visible, intentional part of your decor, you protect your investment while showcasing your collection with pride.
Installing Floating Shelves for Pedals and Accessories
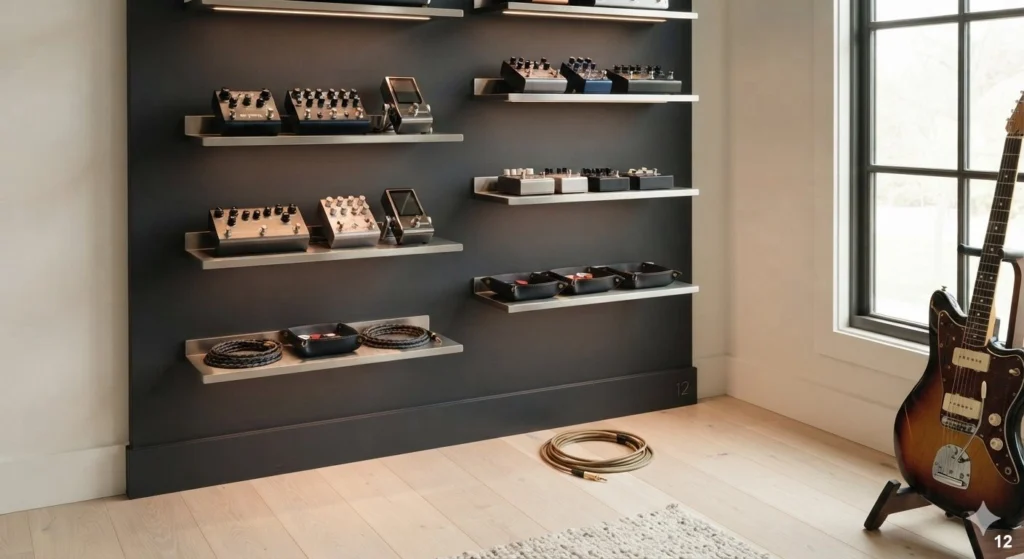
Pedals, tuners, and various musical accessories can quickly turn a sophisticated space into a chaotic workbench. Floating shelves are the perfect solution for keeping these items organized while maintaining a clean, modern aesthetic. By mounting shelves at varying heights, you create a dynamic wall display that draws the eye upward and keeps the floor clear. Choose materials like reclaimed wood for a rustic feel or brushed metal for a more industrial studio vibe.
This approach works best on walls adjacent to your primary practice area, allowing for easy access during jam sessions. To prevent the ‘cluttered workshop’ look, use decorative storage boxes or leather-lined trays on the shelves to corral smaller cables and picks. A common mistake is mounting shelves too high; keep them at a functional height where you can easily reach your gear without disrupting the room’s flow. Ensure the shelving brackets are substantial enough to hold the weight of heavy pedalboards or amplifiers.
Lighting is crucial here; consider under-shelf LED strips to illuminate your pedals, making them feel like curated exhibits in a gallery. This adds a layer of depth to the wall and serves as task lighting during late-night sessions. For a truly elevated look, paint the wall behind the shelves in a slightly darker shade than the rest of the room to add contrast. This simple trick makes your equipment pop, turning functional storage into a deliberate design statement that enhances the overall atmosphere of the room.
Selecting Area Rugs to Define Sound Zones and Style
An area rug is often the unsung hero of a well-designed music room. Beyond adding color and pattern, a high-quality, thick-pile rug serves as a primary acoustic dampener, absorbing sound waves that would otherwise bounce off hard floors. When selecting a rug, prioritize natural materials like thick New Zealand wool or hand-knotted silk blends, which offer superior density and sound-absorbing qualities compared to synthetic alternatives.
This technique works best when used to define specific zones, such as placing a large rug beneath your drum kit or grand piano. It visually anchors the instrument, creating a ‘stage’ that makes the area feel intentional and curated. A common mistake is choosing a rug that is too small; ensure it is large enough to extend well beyond the footprint of your equipment to maximize both sound absorption and visual proportion. For a cohesive look, choose a palette that complements your wall treatments and upholstery.
For an elevated designer look, consider layering rugs—a large, neutral sisal base topped with a smaller, ornate vintage-style rug—to add texture and depth to the room. This not only enhances the acoustic profile but also creates a luxurious, layered aesthetic that feels collected over time. Keep the lighting warm and low, perhaps with a floor lamp nearby, to highlight the texture of the rug’s fibers. A well-placed rug transforms a cold, functional space into a warm, inviting sanctuary where music can truly breathe.
Using Floor-to-Ceiling Curtains for Acoustic Diffusion
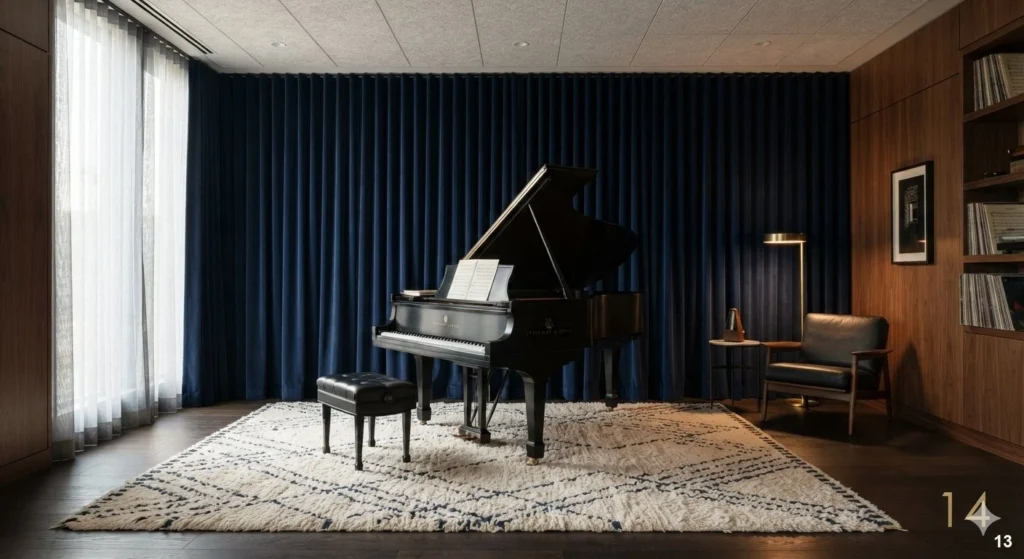
Floor-to-ceiling curtains are one of the most effective ways to introduce luxury and acoustic control to a music room. By installing heavy, floor-length drapery, you create a soft barrier that prevents sound from bouncing off glass windows and hard walls. Opt for heavy-weight fabrics like velvet, heavy linen, or thermal-lined cotton to maximize sound diffusion. The excess fabric folds created by the curtain provide a larger surface area for sound absorption, making them far more effective than blinds or shades.
This design choice works best in rooms with large windows or minimalist architecture, where you need to soften the hard edges of the space. To ensure a premium look, install the curtain rod as close to the ceiling as possible and extend it well beyond the window frame. This creates the illusion of height and makes the room feel grander. Avoid cheap, lightweight fabrics that will flutter with sound vibrations; the heavier the fabric, the better it will perform as an acoustic buffer.
For a sophisticated finish, consider a double-track system: a sheer layer for privacy and natural light during the day, and a heavy blackout velvet layer for evening practice sessions. This allows you to control the mood and the acoustics simultaneously. When the curtains are closed, they provide a cocoon-like environment that is perfect for focused listening or recording. By treating your window coverings as an integral part of your sound management strategy, you achieve a harmonious balance between functional performance and high-end interior design.
Optimizing Small Spaces with Vertical Storage Solutions
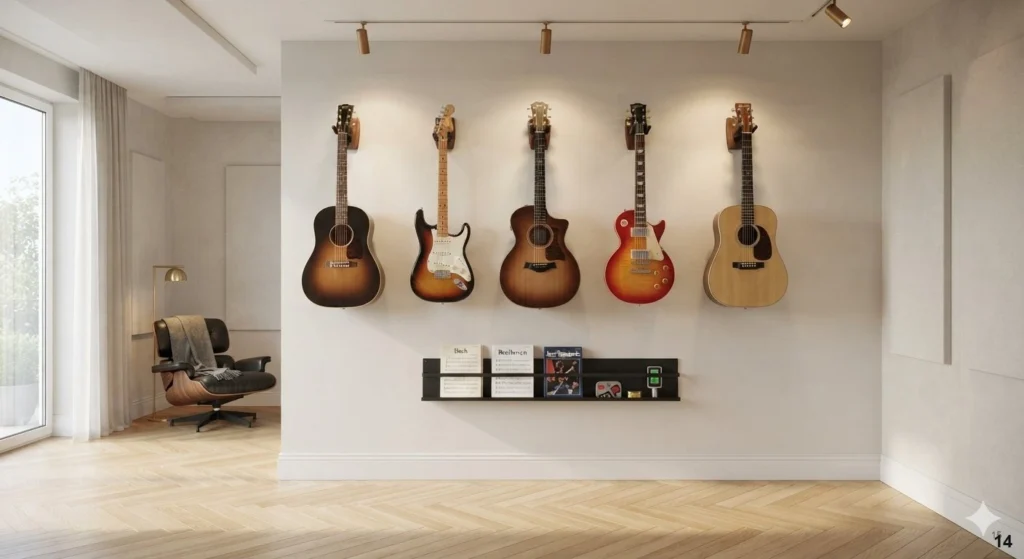
In a compact music room, verticality is your best friend. Instead of crowding the floor with bulky cabinets, utilize your wall space to keep your instruments and accessories neatly organized. Wall-mounted guitar hangers or modular shelving systems allow you to display your equipment as art while keeping the center of the room open for movement. This strategy not only maximizes square footage but also makes the instruments instantly accessible for spontaneous practice.
This works best for urban apartments or dedicated hobby corners where space is at a premium. A common mistake is mounting instruments too close together; maintain enough space between them to allow for easy removal and to ensure they don’t bump into each other. Use a pegboard system painted in a matte finish to blend into the wall, or install individual, high-end wooden hangers that match your room’s trim and furniture. For sheet music and small accessories, install slim, wall-mounted racks that keep everything within arm’s reach.
To enhance the aesthetic, treat your vertical storage as a curated gallery. Use soft, directional track lighting to highlight each instrument on the wall, creating a ‘feature wall’ effect. This draws the eye upward, making the room feel taller and more expansive. Keep the color palette light and neutral on the walls to prevent the vertical storage from feeling overwhelming. By thinking vertically, you transform a cramped space into a highly efficient, stylish studio that feels both professional and personal.
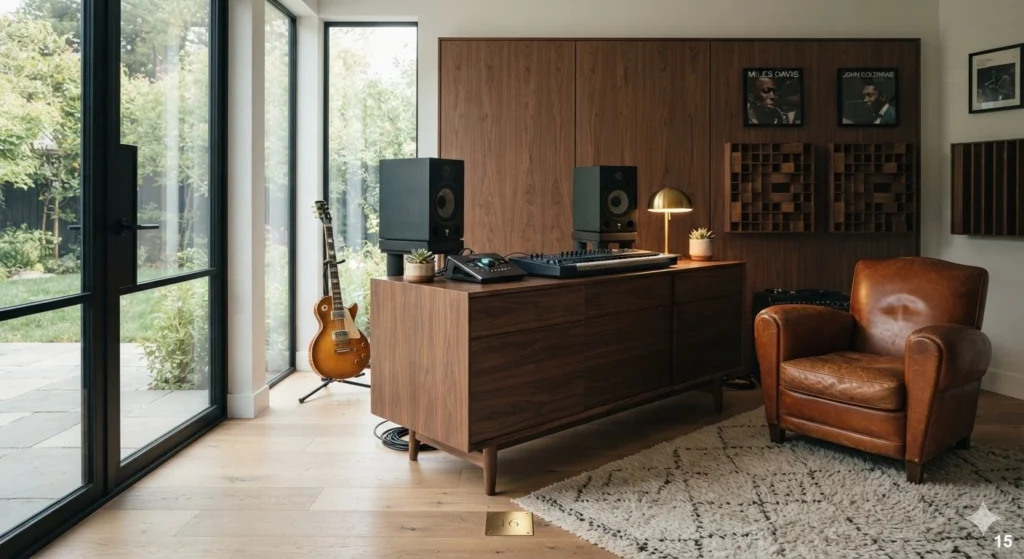
Blending Modern Studio Gear with Vintage Furniture
The secret to a truly sophisticated music room lies in the marriage of cutting-edge technology and timeless design. Mixing modern studio gear with vintage furniture prevents the room from feeling like a cold, sterile laboratory. Start with a vintage mid-century desk or a classic leather club chair, then layer in your high-tech interfaces, monitors, and keyboards. This contrast creates a rich, layered aesthetic that feels intentional, curated, and deeply personal.
This approach works best in rooms that double as home offices or living spaces. A vintage credenza, for instance, can hide messy cabling and house your studio monitors, while a modern ergonomic chair provides the support needed for long hours of mixing. A common mistake is trying to hide the equipment entirely; instead, celebrate the gear by placing it on top of a beautiful, antique wood surface. This juxtaposition highlights the beauty of both the old and the new.
To tie the look together, use a consistent color palette that bridges the gap between your vintage pieces and modern equipment. If your gear is black and metallic, incorporate vintage items with dark wood tones or brass accents to create a cohesive theme. Lighting is the final piece of the puzzle; use a vintage-inspired brass desk lamp for task lighting, paired with modern, dimmable recessed lighting to set the mood for the evening. By blending these styles, you create a space that is not only a functional music hub but also a stunning reflection of your personal style and appreciation for history.
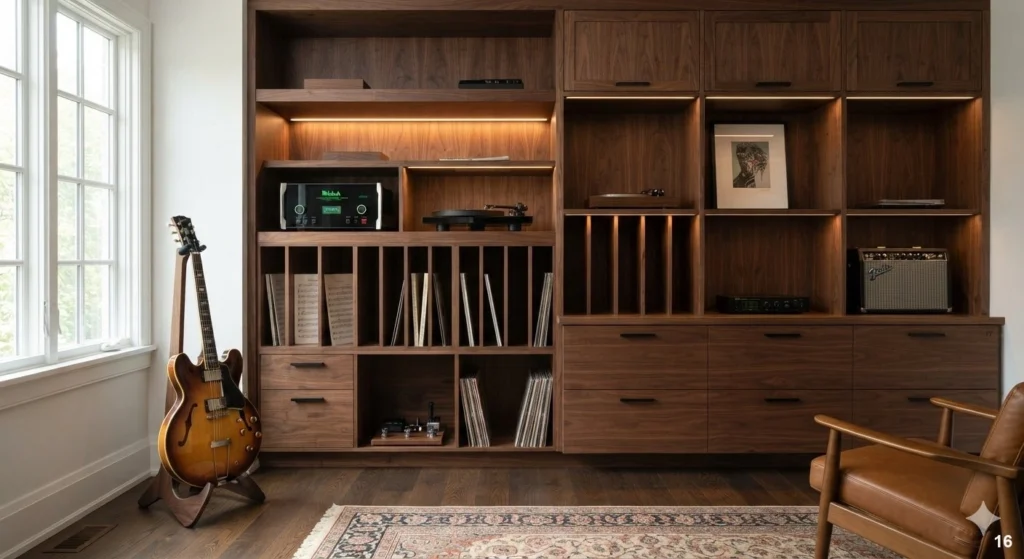
Customizing Built-in Cabinetry for Equipment Organization
A music room often suffers from the visual noise of cables, pedals, and hardware. The solution lies in bespoke cabinetry that functions as both a refined storage vessel and an organizational hub. By incorporating deep, soft-close drawers for sensitive electronics and vertical slots for sheet music, you eliminate the clutter that typically plagues home studios. Opt for cabinetry that matches your home’s existing woodwork, such as white oak or walnut, to ensure the room feels like a purposeful extension of your living space rather than a cluttered utility closet.
Functionality is paramount, so integrate cable management ports directly into the cabinetry backs. This hidden infrastructure allows you to route power cords through the unit, keeping surfaces clean and safe. Consider adding LED ribbon lighting beneath the shelves to illuminate your gear, providing a high-end look that makes even the most utilitarian equipment feel like a curated collection. A common mistake is using standard shelving that lacks the depth for bulky amplifiers; ensure your custom millwork is measured to accommodate your specific hardware dimensions. For a polished aesthetic, use matte-finish hardware in brass or matte black to complement the deep tones of your instruments. When your gear is organized and easily accessible, the barrier to creative expression disappears, leaving only the music.
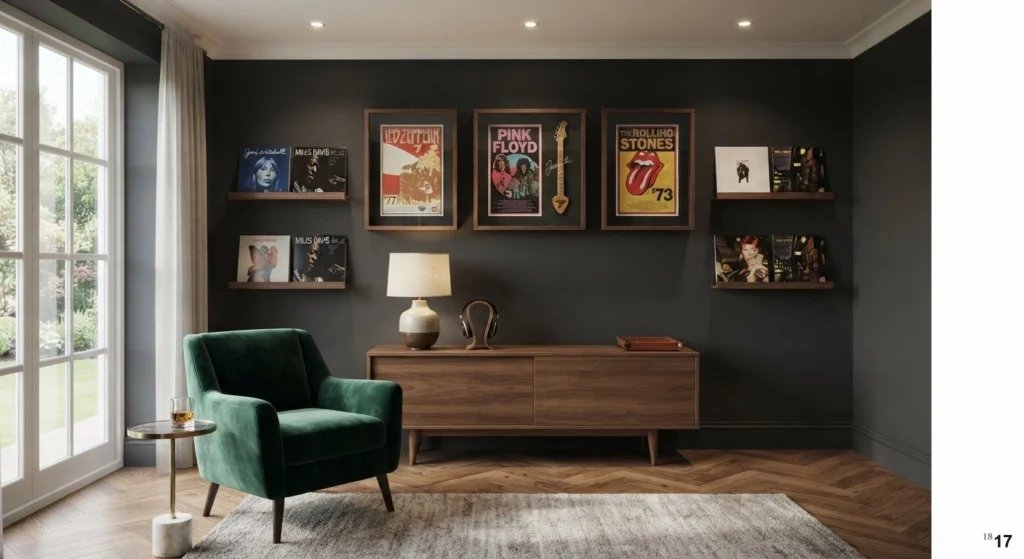
Adding Personal Touches with Musical Memorabilia Displays
Your music room should be a reflection of your artistic journey. Incorporating memorabilia—whether it is a framed concert poster, a vintage vinyl collection, or a signed instrument—adds soul to the space. The key to maintaining an elevated look is to curate these items rather than cluttering the walls. Use museum-quality shadow boxes for smaller artifacts and floating shelves for your most prized records. This approach turns your personal history into a sophisticated gallery display.
Placement is everything. Group your items at eye level to create a focal point, perhaps above a console or a dedicated listening chair. Avoid the common mistake of hanging memorabilia haphazardly; instead, follow the ‘rule of three’ or create a symmetrical grid for a balanced, intentional look. Lighting plays a crucial role here as well. Position picture lights or recessed spotlights to highlight the textures of your displays without causing glare on glass surfaces. If your collection includes vintage instruments, consider using wall-mounted display hangers that are padded to protect wood finishes. By blending these personal treasures with high-quality interior finishes, you ensure the room feels like a sanctuary of inspiration. It is this balance of professional acoustic design and intimate personal history that transforms a room into a true studio space.
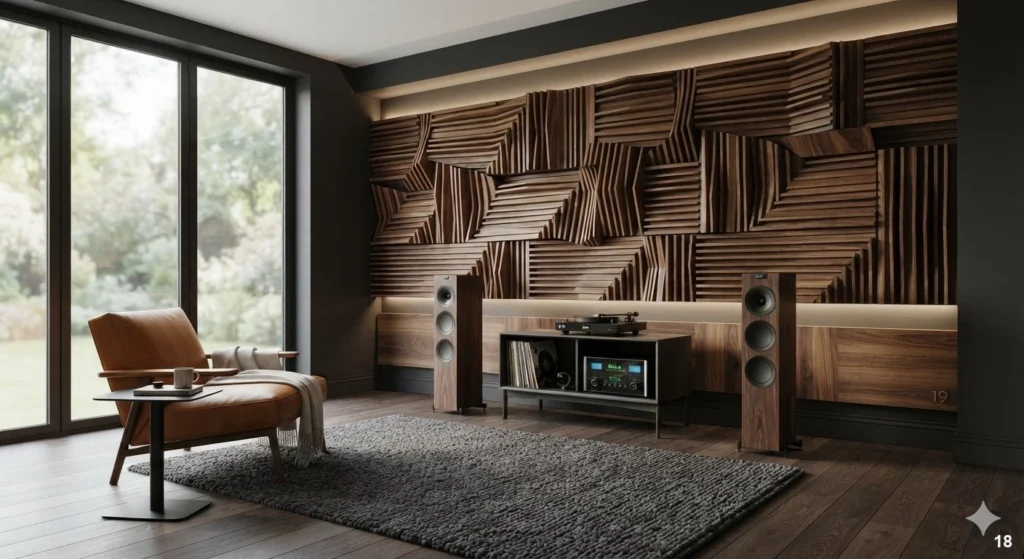
Strategic Placement of Diffusers for Balanced Acoustics
Acoustic treatment is often viewed as a purely technical necessity, but when approached with a designer’s eye, it becomes a stunning architectural feature. Diffusers—panels designed to scatter sound waves to reduce echoes—can be integrated into your walls as geometric art. Wood-slat diffusers, in particular, bring warmth and a sculptural quality to a room. Place them at the first reflection points on the side walls to improve clarity and create a more immersive listening environment.
For the best results, use a mix of diffusion and absorption. You can install diffusers in a repetitive, rhythmic pattern that spans a full wall, creating a dramatic, textured backdrop that feels intentional and high-end. Avoid the mistake of over-treating the room, which can lead to a ‘dead’ sound that lacks the natural vibrancy of a live performance. Instead, prioritize symmetry to ensure the soundstage remains balanced for the listener. Consider using sustainable bamboo or reclaimed timber to add organic texture, which pairs beautifully with modern metal furniture. Lighting is also essential; wash the diffusers with soft, indirect wall-grazing light to emphasize their depth and pattern. This technique elevates the room from a simple practice space to a professional-grade listening environment that is as beautiful as it is technically sound.
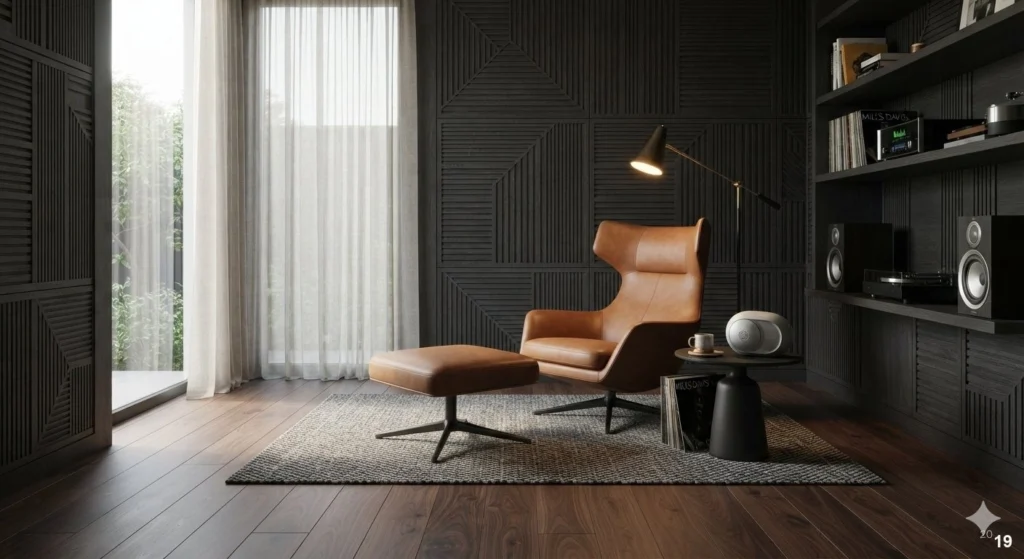
Choosing Statement Seating for a Professional Studio Vibe
In a music room, seating must bridge the gap between comfort for long listening sessions and the polished aesthetic of a professional studio. A statement chair acts as the anchor for the room, inviting you to sit and engage with the music fully. Look for pieces with clean lines and tactile upholstery, such as velvet, boucle, or top-grain leather, which not only look luxurious but also offer subtle sound-dampening qualities.
For a truly elevated vibe, choose a lounge chair with an ottoman to encourage relaxation. If your space is limited, a sculptural leather armchair provides a timeless, masculine elegance that complements the natural materials of most instruments. Avoid overly plush or bulky recliners that can overwhelm the room’s proportions. Instead, focus on silhouettes that feel airy yet substantial. Place your seating slightly off-center to allow for optimal acoustic dispersion in the room, and pair it with a low, circular side table to hold a beverage or a notebook. Lighting should be focused here; a sleek floor lamp with an adjustable arm allows you to switch between ambient mood lighting and functional task lighting for reading scores. By selecting a piece that serves as a visual ‘hero,’ you establish the room as a place of focused, intentional activity. This approach ensures your studio feels like a private retreat tailored for the refined ear.
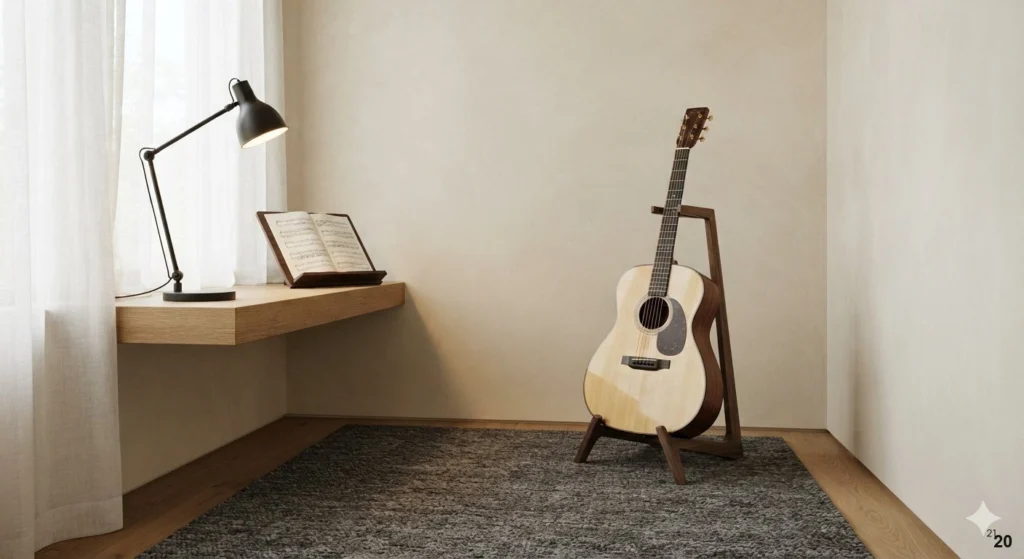
Designing a Minimalist Corner for Solo Musicians
For the solo musician, a minimalist corner can be the most productive sanctuary in the home. The philosophy here is ‘less is more’—focusing on a single, well-placed instrument and the minimal equipment needed to perform. By stripping away extraneous items, you create a space that promotes deep concentration and creative flow. Use a clean, floating shelf or a slim-profile stand to house your instrument, allowing it to serve as the singular focal point of the area.
Keep the color palette monochromatic or neutral to maintain a calm, distraction-free environment. Soft greys, warm creams, or deep charcoal tones work exceptionally well, providing a sophisticated backdrop that highlights the craftsmanship of your instrument. Ensure the floor is covered by a high-quality wool or woven area rug, which serves the dual purpose of grounding the space visually and softening the room’s acoustics. A common mistake is placing this corner in a high-traffic area; find a quiet nook away from the main living spaces to ensure privacy. Add a single, high-quality task lamp with a warm color temperature to create an intimate pool of light for reading music. This focused setup is perfect for apartments or smaller homes where a dedicated studio room isn’t feasible. It proves that you don’t need a massive footprint to cultivate a professional-grade space; you simply need the right environment to foster your craft.
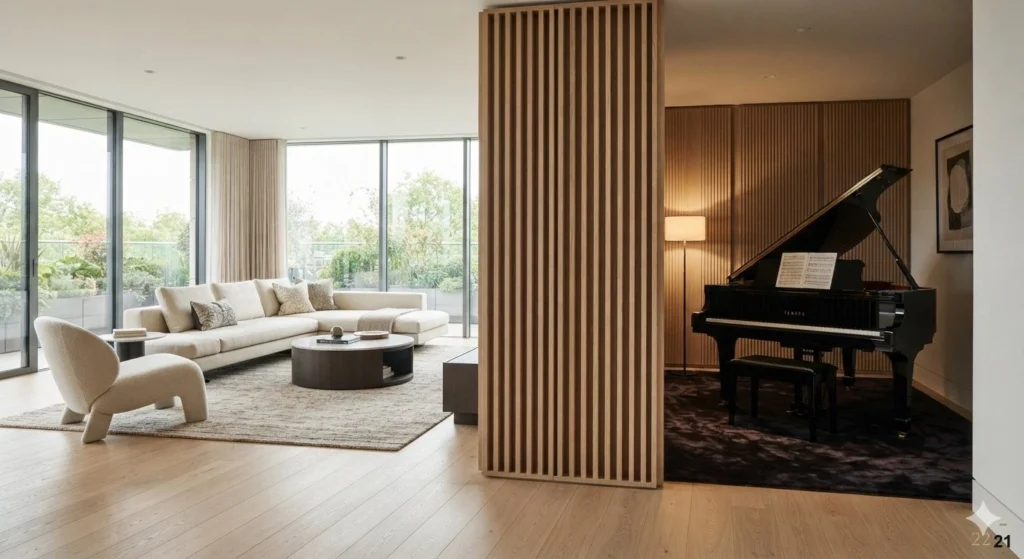
Using Decorative Screens to Divide Music and Living Areas
Integrating a music room into a larger living area requires a delicate balance between openness and acoustic separation. Decorative screens are an excellent, versatile solution that adds a layer of sophistication while physically defining the studio zone. Opt for screens crafted from perforated metal, woven rattan, or slatted wood; these materials provide a sense of division without blocking natural light, maintaining an airy and refined feel throughout the home.
When choosing a screen, consider the acoustic properties of the material. A heavy, fabric-covered screen will offer better sound absorption than a thin metal one, helping to contain the noise of your practice sessions. Position the screen to create a semi-private ‘stage’ for your instruments, which adds a sense of theatrical flair to the room. Avoid using flimsy, temporary room dividers; invest in architectural-grade screens that feel like permanent fixtures. You can also use tall, indoor plants or floor-to-ceiling bookshelves as natural, decorative dividers to achieve a similar effect. Ensure the style of your divider complements your existing furniture—for example, a black metal frame for an industrial look or a light oak finish for a Scandi-inspired aesthetic. This approach allows you to enjoy your music without compromising the flow of your home’s interior design. It creates a ‘room within a room,’ giving the music space its own distinct identity while keeping the house feeling cohesive and connected.
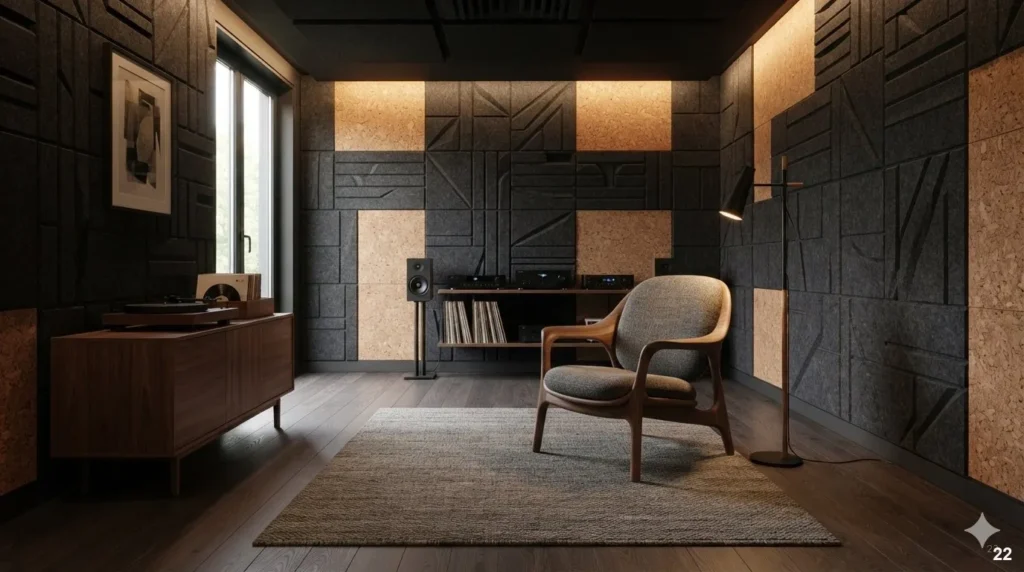
Selecting Sustainable Materials for Sound-Dampening Surfaces
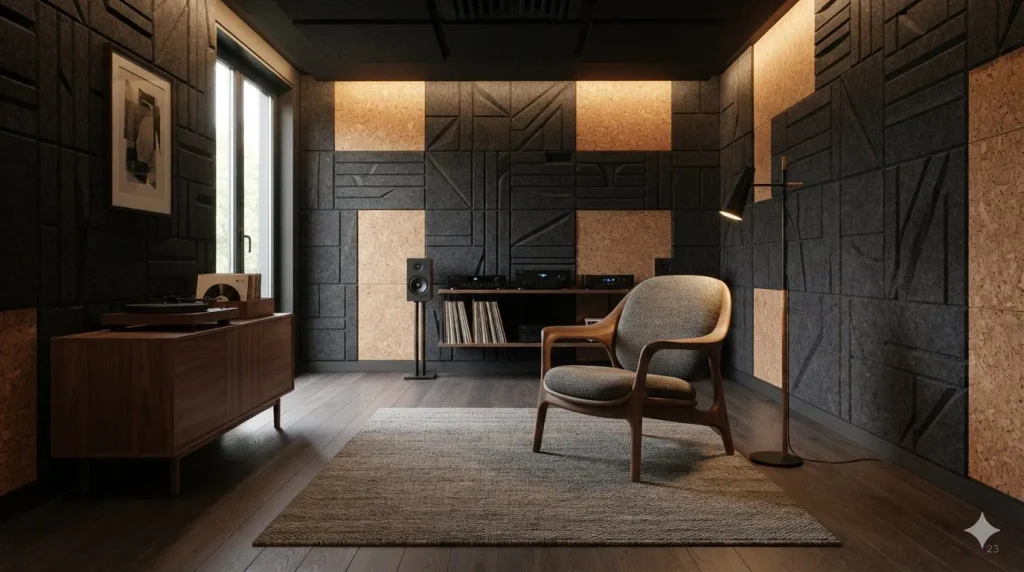
Designing a music room with sustainability in mind adds an ethical layer of luxury to your home. Materials like cork, recycled felt, and reclaimed wood are not only environmentally conscious but also possess excellent acoustic-dampening properties. Cork, in particular, is a designer favorite; it is naturally sound-absorbent, durable, and provides a beautiful, organic texture that adds warmth to a space. You can install it as wall-to-wall flooring or as modular wall panels that double as tack boards for your sheet music.
Recycled felt panels are another fantastic option. They come in a variety of sophisticated colors and can be arranged in geometric patterns to create a bespoke feature wall. These materials help control reverberation, ensuring your music sounds crisp and clear. When selecting these finishes, look for low-VOC products to ensure the air quality in your studio remains healthy, which is vital for a space where you will be spending hours at a time. Avoid synthetic, foam-based acoustic treatments that look cheap and off-gas chemicals. Instead, embrace the beauty of natural fibers. Pair these surfaces with sustainable furniture pieces, such as chairs made from FSC-certified wood or upholstery from organic linen. Lighting should be warm and gentle to highlight the natural textures of the cork or felt. This holistic approach ensures that your music room is not only a haven for sound but also a responsible, enduring space that reflects your commitment to quality and the environment.
Creating a Cohesive Flow Between the Studio and Home Decor
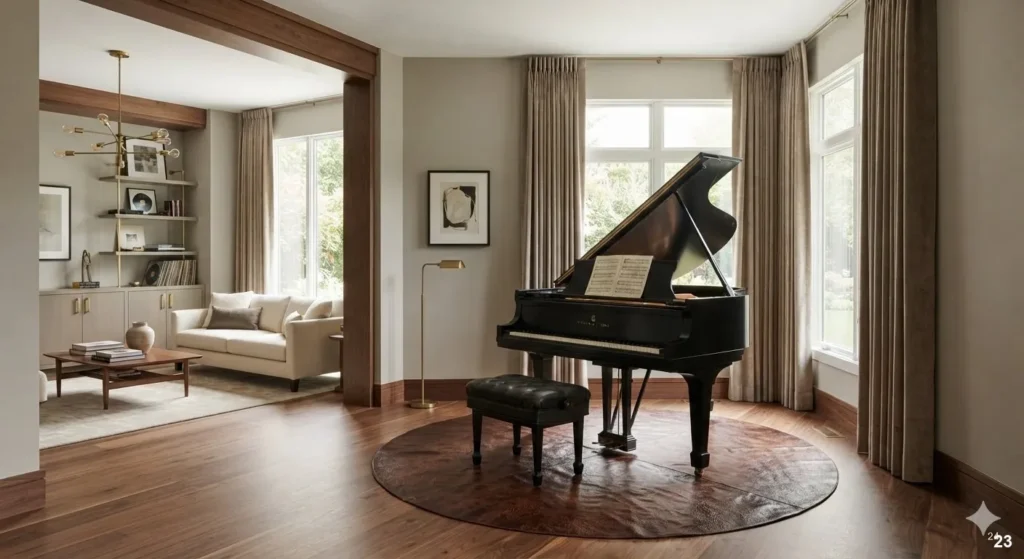
The hallmark of a truly elevated home is a music room that feels integrated into the overall design narrative of the house. To achieve this, carry your color palette, flooring, and lighting styles from the adjacent rooms into your music space. If your home features a neutral, monochromatic palette, keep the studio consistent by using similar tones but playing with texture—such as adding a velvet curtain or a leather rug—to denote a shift in function.
Avoid the ‘isolated hobby room’ look by ensuring that your musical equipment is treated as part of the decor rather than tucked away in a corner. A beautiful piano or a collection of guitars can be styled just like a piece of art. Use consistent hardware finishes throughout—if you have brass accents in your kitchen or living room, bring that same brass into the music room through cabinet pulls or lighting fixtures. This repetition creates a visual ‘thread’ that ties the rooms together. Lighting is another powerful unifier; use the same family of light fixtures throughout the home to maintain a consistent aesthetic language. A common mistake is to treat the music room as a separate entity with a completely different design style, which can make the house feel disjointed. By blending the studio into your home’s existing design, you ensure that the space remains inviting and elegant. It becomes a room that you are proud to display, rather than one you feel the need to close off behind a door.
Elevating the Listening Experience with Curated Room Accents
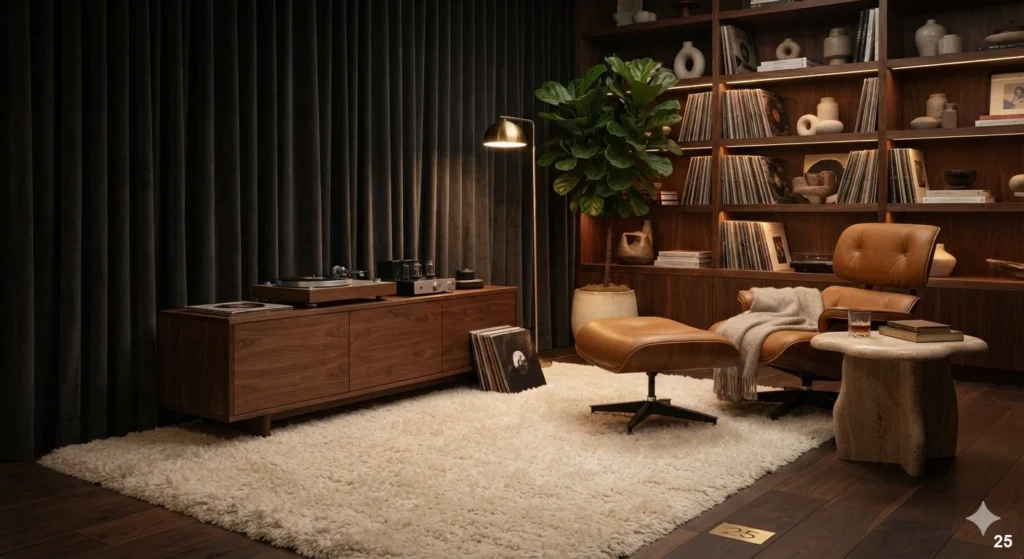
A music room is fundamentally a sanctuary for the senses, and your decor should reflect that intimacy. Beyond the technical equipment, the room must feel like a curated extension of your home’s character rather than a cold studio. Focus on tactile materials that serve a dual purpose: aesthetic warmth and acoustic softening. Heavy, floor-to-ceiling velvet or linen drapery is essential here; it absorbs sound reflections while adding a layer of architectural luxury to the space. Pair these with plush, high-pile wool rugs that ground the room and prevent sound from bouncing off hard flooring surfaces.
When it comes to smaller accents, think about the intersection of form and function. Leather-bound storage boxes are perfect for organizing sheet music or cables, keeping visual clutter at bay without sacrificing style. Incorporating natural elements like large-scale potted plants or stone side tables adds organic texture, which helps break up the rigid lines of audio gear. If your room doubles as a library, integrate open shelving that houses both vinyl collections and sculptural objects. This prevents the space from feeling like a storage unit and ensures the room feels lived-in and intentional.
Lighting should be layered to accommodate different moods. Avoid harsh overhead lighting, which can make the space feel sterile. Instead, opt for dimmable floor lamps with warm-toned bulbs to highlight your instrument displays or create a cozy reading nook for studying scores. A common mistake is neglecting the impact of hard surfaces; if you have a large glass window or a stark wall, introduce acoustic art panels that look like gallery pieces but actively manage sound waves. By treating every element—from the texture of your throw pillows to the finish on your hardware—with the same care as your sound equipment, you create a truly elevated listening environment.
Frequently Asked Questions
How can I balance soundproofing needs with a sophisticated home aesthetic?
You do not have to sacrifice style for performance. Instead of industrial-looking foam, opt for fabric-wrapped acoustic panels that double as gallery-style wall art. Incorporate heavy, floor-to-ceiling velvet or linen curtains to dampen sound while adding a touch of luxury. By choosing materials like high-density felt or decorative wood diffusers, you can treat the room for optimal acoustics while maintaining a refined, modern interior design that feels like a natural extension of your home rather than a sterile studio.
What is the best way to display instruments without cluttering the room?
Treat your instruments as curated focal points rather than mere equipment. Using high-quality wall hangers or custom floor stands allows you to display your collection safely while preserving floor space. For a more sophisticated look, integrate built-in cabinetry with glass-front display cases to protect sensitive finishes from dust and humidity. If you have a smaller room, use vertical wall space to create a ‘gallery wall’ of guitars or string instruments, ensuring they are securely mounted at eye level to serve as both functional tools and art.
How do I hide cables and wires for a clean, minimalist look?
Cable management is essential for a professional and tidy environment. Use decorative cable sleeves that match your wall color to blend wires into the background. For larger setups, consider incorporating furniture with built-in cable channels or using hidden floor molding that conceals wiring runs. If you have a desk or workstation, utilize under-mount trays to keep power strips and excess cords off the floor. The goal is to ensure that the visual focus remains on the music and your beautiful decor, not on the technical infrastructure.
What kind of lighting works best for a music room?
A layered lighting approach is vital. Start with ambient overhead lighting, such as dimmable recessed lights, to set the mood for listening or practice. Supplement this with task-specific lighting, like sleek, adjustable floor lamps or desk lamps, to ensure you have enough visibility for reading sheet music or making equipment adjustments. Incorporating LED strips behind acoustic panels or shelving can also create a soft, sophisticated glow that highlights the architectural features of your room without creating harsh glare or distracting reflections during your creative sessions.
Can I incorporate a music space into a multi-purpose living area?
Absolutely. You can create a dedicated ‘zone’ for music within a larger room by using area rugs to define the space visually and acoustically. Decorative room dividers, such as open shelving units or sliding panels, can provide a soft separation between your studio gear and the rest of your living area. By selecting furniture that complements the existing decor of your home—such as blending vintage chairs with modern studio equipment—you can ensure the music corner feels like a cohesive, intentional part of your home rather than an afterthought.
Conclusion
Designing a dedicated music room is a rewarding process that bridges the gap between technical performance and personal expression. By thoughtfully integrating acoustic treatments as design elements and prioritizing clean, organized displays for your instruments, you can transform any space into a professional-grade sanctuary that feels warm, inviting, and uniquely yours.
We encourage you to start small by focusing on one area, such as upgrading your lighting or installing a display wall for your favorite instrument. Once you experience how these subtle, elevated changes enhance both your sound and your environment, you will be inspired to refine the rest of your space. With a focus on balance and quality, your new music room will surely become the most inspiring corner of your home.