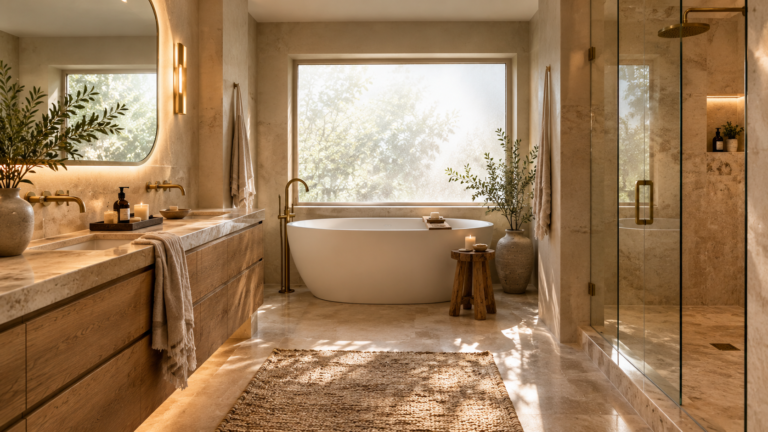
There is a distinct difference between a bathroom that simply facilitates a morning routine and one that serves as a personal wellness sanctuary. At the heart of this elevated experience is the shower—specifically, the gentle, immersive cascade of a well-designed rain shower. Transforming your daily wash into a restorative ritual is the ultimate goal of any high-end primary bathroom renovation, turning a functional space into a private boutique-hotel escape.
However, designing a truly high-end shower involves more than just picking a beautiful fixture. Many homeowners struggle to balance the gentle rainfall effect with adequate water pressure, or find themselves overwhelmed by the technicalities of ceiling heights, drainage capacity, and avoiding chilly drafts in spacious walk-in layouts. It is easy to worry that adding secondary handheld sprayers or body jets will clutter your clean aesthetic, or that the final installation won’t deliver that seamless, high-end look you envision.
To help you navigate these design and plumbing decisions, we have curated a collection of sophisticated luxury rain shower ideas that marry engineering precision with enduring style. Whether you are leaning toward a minimalist recessed ceiling design, a natural stone wet room, or a classic marble enclosure, you will find the practical advice and visual inspiration needed to execute your project flawlessly. Read on to discover how to balance form and function to create your own architectural sanctuary.
Ceiling-Recessed Flush Rain Panel with Perimeter Ambient Lighting
A ceiling-recessed flush rain panel represents the pinnacle of modern architectural integration, transforming your shower into a seamless sky-like source of water. By embedding the fixture directly into the ceiling plane, you eliminate visual clutter and maintain clean, uninterrupted lines throughout the bathroom. This setup works exceptionally well in master suites with standard to high ceilings, where a protruding shower arm might disrupt the minimalist aesthetic. To elevate this experience, integrate a perimeter channel of soft, warm LED lighting around the recessed panel. This ambient glow catches the falling water droplets, creating a shimmering, therapeutic column of light that enhances your sensory relaxation. When selecting materials, opt for a brushed nickel or matte white panel that disappears into the ceiling finish. Pair this with large-format, neutral-toned porcelain or limestone tiles to keep the focus on the water and light. A common mistake is neglecting the proper ceiling support and waterproofing needed for a flush-mount installation; ensure your contractor frames out the ceiling correctly to prevent future sagging or leaks. For an extra touch of designer luxury, connect the ambient perimeter lighting to a smart dimmer switch. This allows you to transition from a bright, energizing morning wash to a low-lit, moody evening soak that mimics a high-end wellness spa.
Bookmatched Calacatta Marble Wet Room with Overhead Downpour
Few materials command attention and evoke luxury quite like bookmatched Calacatta marble. In a spacious wet room, aligning two mirror-image slabs of this iconic Italian stone creates a breathtaking, artistic focal point that frames your overhead downpour. The natural, dramatic grey and gold veining of the marble provides an organic contrast to the clean, engineered lines of a premium rain shower head. This design works best in open-concept wet rooms where the wet area is integrated with a freestanding soaking tub, allowing the marble to serve as a unified backdrop. To complement the warm undertones of Calacatta gold, choose a ceiling-mounted rain shower fixture in polished nickel or brushed bronze. The reflective metal beautifully catches the light, adding a touch of classic glamour to the space. When styling, keep other details minimal—let the stone do the heavy lifting. A critical mistake to avoid is using highly polished marble on the shower floor, which becomes incredibly slippery when wet; always specify a honed finish or small-format mosaic tiles for the flooring to ensure slip resistance. For a designer-approved finishing touch, install a subtle, directional spotlight in the ceiling to illuminate the bookmatched seam, turning your shower wall into a literal masterpiece of natural art.
Dual-Source Configuration Pairing Overhead Rain with a Concealed Hand Wand
While an overhead rain shower offers an unmatched, immersive sensory experience, pairing it with a concealed hand wand brings essential versatility and high-performance utility to your daily routine. This dual-source configuration allows you to enjoy the gentle, cloud-like cascade of a rain shower while retaining the practical pressure needed for rinsing hair or cleaning the shower enclosure. This setup is highly recommended for busy primary bathrooms where functionality must seamlessly coexist with luxury. To maintain a clean, uncluttered aesthetic, opt for a hand wand with an integrated water outlet and bracket, minimizing the amount of exposed wall hardware. Choose a cohesive metallic finish for both fixtures, such as gunmetal or brushed brass, to create a unified design language. Pair these metallic accents with cool grey slate or deep charcoal tiles to create a sophisticated, high-contrast look. A common layout mistake is mounting the hand wand too far from the main shower zone or at an awkward height; instead, position it on an adjustable slide bar or at a comfortable shoulder height near your primary standing position. A designer tip is to select a thermostatic diverter valve that allows both the overhead rain head and the hand wand to run simultaneously, giving you a fully customizable, multi-directional water experience.
Monolithic Fluted Glass Screen with Minimalist Matte Black Accents
A monolithic fluted glass screen is the perfect architectural solution for separating your rain shower while maintaining an airy, light-filled atmosphere. The beautiful vertical ridges of the fluted glass mimic the texture of falling water, offering a sophisticated layer of privacy without completely blocking the view or the flow of natural light. This design works wonderfully in compact luxury bathrooms or narrow walk-in layouts where a solid wall would feel too heavy and enclosing. To anchor the glass panel and add a graphic, contemporary edge, frame it with minimalist matte black metal channels. This dark framing creates a stunning contrast against light-colored tiles or plaster walls. For a harmonious color palette, pair the matte black accents with soft white terrazzo or warm oak cabinetry nearby. A frequent mistake when installing textured glass is putting the ridged side on the inside of the shower, where soap scum and hard water deposits can build up in the grooves; always ensure the smooth side of the glass faces inward for effortless cleaning. To elevate the look, install a linear recess light in the ceiling directly above the glass screen. This allows the light to catch the flutes, casting a beautiful, soft pattern of shadows and highlights across the entire bathroom.
Waterproof Tadelakt Plaster Surround with a Suspended Dropped-Arm Fixture
For those seeking an organic, tactile sanctuary, a waterproof Tadelakt plaster surround offers an exquisite alternative to traditional tiling. Originating in Morocco, this hand-polished lime plaster creates a seamless, joint-free surface with a soft, natural sheen that feels incredibly warm and velvety to the touch. It works beautifully in coastal, Mediterranean, or transitional homes, bringing a sense of wabi-sabi elegance to the shower. Pair this earthy wall finish with a suspended dropped-arm rain shower fixture. The long, elegant curve of the shower arm adds an artistic, sculptural element to the space, balancing the rustic texture of the plaster. Choose a rich, living finish like unlacquered brass or oil-rubbed bronze for the fixture, which will develop a beautiful patina over time and complement the plaster’s organic nature. Opt for soft, earthy plaster tones like warm sand, pale olive, or plaster pink, and illuminate the space with soft, indirect lighting to highlight the hand-troweled variations in the wall. A critical mistake to avoid is hiring an uncertified installer; Tadelakt requires highly specialized application techniques and regular olive-oil soap sealings to remain completely waterproof. A designer favorite is to curve the corners of the plaster walls to create a soft, cocoon-like enclosure that enhances the soothing, spa-like atmosphere.
Cantilevered Honed Limestone Shower Bench Positioned Beneath the Cascade
A cantilevered honed limestone bench elevates your rain shower from a simple washing station to a true wellness sanctuary. It provides a dedicated space to sit, relax, and let the warm overhead cascade wash over you, mimicking the experience of a luxury thermal spa. This feature works best in elongated walk-in showers where the bench can be integrated seamlessly along one wall without obstructing movement. Honed limestone is the ideal material for this application; its matte, velvety surface feels naturally warm and comfortable against the skin, unlike cold, polished stones. To create a striking architectural statement, have the bench cantilevered from the wall with hidden steel supports, making it appear to float effortlessly. Pair the creamy beige or warm ivory tones of the limestone with soft travertine wall tiles and brushed gold fixtures for a serene, monochromatic palette. A common mistake is installing the bench completely flat, which leads to water pooling; ensure it is sloped forward by a fraction of an inch to allow water to drain naturally. A designer-inspired tip is to install low-voltage, waterproof LED strip lighting underneath the cantilevered bench to cast a soft glow across the shower floor, emphasizing the floating effect and creating a magical ambiance for evening showers.
Floor-to-Ceiling Steel-Framed Glass Enclosure for an Urban Sanctuary
A floor-to-ceiling steel-framed glass enclosure brings a sophisticated, architectural structure to your bathroom, framing your luxury rain shower like a curated work of art. This design works exceptionally well in urban lofts, modern townhouses, or any home with generous ceiling heights, adding a sense of grand scale and industrial elegance. The black steel grid pattern provides a strong graphic element that beautifully contrasts with the soft, organic flow of the water. To complement this bold frame, choose an oversized, high-volume rain shower head in a matching matte black or a contrasting polished chrome finish. Pair the enclosure with classic white subway tiles, concrete-look large-format porcelain, or rich dark slate to complete the urban aesthetic. When designing the grid, avoid overcomplicating the pattern in smaller spaces, as too many black lines can make the bathroom feel cluttered and visually confined. Instead, opt for larger glass panes with simple, clean mullions. A designer tip is to use a pivot door instead of a sliding mechanism, which keeps the hardware minimal and preserves the clean, architectural lines of the steel frame. Ensure the glass is treated with an anti-limescale coating to keep the enclosure looking pristine and crystal-clear.
Offset Thermostatic Control Station Located Outside the Direct Water Path
One of the most thoughtful details in a luxury bathroom layout is an offset thermostatic control station located completely outside the direct path of the water. This design allows you to turn on the shower and adjust the water to your exact preferred temperature before you ever step inside, eliminating the unpleasant shock of cold water. This setup works beautifully in spacious walk-in showers, wet rooms, or open-concept layouts where the entrance is a few feet away from the shower head. Mount the controls at elbow height on an entry partition wall or just inside the shower opening. Choose a sleek, low-profile valve plate in a premium finish like brushed platinum or satin bronze that coordinates with your primary shower fixtures. To keep the look clean, pair the controls with minimalist wall tiles, such as a subtle terrazzo or a smooth basalt. A common mistake is placing the controls too close to the shower head or behind a glass door that requires you to reach through the water stream to access them. For the ultimate modern upgrade, opt for a digital thermostatic controller with programmable presets, allowing you to activate your ideal shower temperature with a single touch.
9. Seamless Curbless Entry with an Integrated Wall-to-Wall Linear Drain
A curbless shower entry instantly dissolves the threshold between the dry vanity area and the wet zone, creating an expansive, unbroken sightline that enlarges the bathroom footprint visually. Eliminating the raised curb allows your flooring material to flow continuously, imbuing the space with an airy, boutique-hotel elegance. Paired with a wall-to-wall linear drain, this configuration ensures high-volume water from an overhead rain head evacuates swiftly and discreetly along a single, gently pitched plane.
This setup works exceptionally well in transitional and contemporary primary bathrooms where visual calm and accessible luxury are paramount. Laying large-format honed limestone or porcelain slabs across both zones creates a monolithic aesthetic. For color palettes, warm greige, soft ivory, or sand-toned slabs paired with a tile-insert linear drain disguise the plumbing entirely, leaving only a hairline drainage channel visible along the perimeter.
Lighting should remain understated. Soft, indirect ceiling cove illumination grazing the shower back wall accentuates the level floor plane without producing harsh floor reflections. A common pitfall in curbless execution is inadequate subfloor recalculation. Without pitching the joists precisely at one-quarter inch per foot toward the linear drain, standing water will migrate toward the dry zone.
To elevate the architectural composition, introduce a single sheet of ultra-clear starphire glass with minimal recessed floor channels. This keeps the barrier practically invisible while deflecting overspray from the deluge above.
10. Oversized Square Rain Fixture with Integrated Hydrotherapy Spray Settings
An oversized square rain fixture measuring sixteen to twenty-four inches serves as both an architectural statement and an immersive hydrotherapy vessel. Flush-mounting the fixture directly into the ceiling envelope preserves vertical headroom and creates a clean, monolithic ceiling plane. The expansive square footprint ensures true shoulder-to-shoulder water coverage, enveloping the body in a steady, drenching rainfall rather than a narrow central stream.
This system works best in primary ensuites featuring ceilings of nine feet or higher, where surface-mounted pendant pipes can feel visually cluttered. Incorporating hydrotherapy modes—such as a gentle soft-mist spray for calming morning rinses or an invigorating central cascade waterfall for post-workout recovery—transforms the shower into an authentic domestic spa. Complement the ceiling fixture with a concealed secondary handheld wand in matching matte bronze or brushed nickel for practical daily maintenance.
Pair this hardware with refined stone slab walls, such as honed Fior di Bosco marble or warm Venetian plaster. Introduce waterproof warm-temperature pin spots tucked slightly away from the fixture to illuminate the falling water droplets without creating harsh ceiling glare. A frequent design oversight is failing to upgrade the rough-in plumbing to a three-quarter-inch supply line; standard half-inch pipes cannot supply sufficient volume to run high-capacity hydrotherapy modes effectively.
For a refined designer finish, paint the surrounding ceiling in a subtle, moisture-resistant shade that coordinates with the metal faceplate to integrate the hardware seamlessly.
11. Nature-Immersed Shower Layout with a Floor-to-Ceiling Private Garden View
Framing your rain shower against an expansive window overlooking a private landscaped courtyard introduces an immediate biophilic connection. The sensory contrast of warm falling water indoors while gazing out at lush green ferns, bamboo, or Japanese maples evokes the tranquil ambiance of an outdoor tropical sanctuary. It turns the morning shower into an immersive nature retreat that feels completely separated from daily routines.
This architectural strategy is ideal for ground-floor primary suites flanked by private exterior privacy walls, internal atriums, or enclosed lightwells. Using floor-to-ceiling fixed glass panels without heavy muntins provides an uninterrupted view of the garden. To ground the space organically, choose flooring in textured dark basalt, charcoal river stone, or fluted travertine that echoes the natural foliage outside.
Natural daylight does the heavy lifting here, bathing the shower in changing atmospheric light throughout the day. For evening hours, place discreet exterior uplights in the garden beds outside the glass to maintain the outdoor connection while keeping interior shower lighting moody and subdued. A critical mistake to avoid is using standard double-paned glass without an exterior anti-condensation or easy-clean coating, which causes water droplets and steam to obscure the garden view.
Enhance the indoor-outdoor dialogue by placing a low-slung, moisture-resistant teak stool or floating bench near the glass line, softening the clean lines of stone and metal.
12. Warm Unlacquered Brass Rain Fixtures Against Deep Charcoal Slabs
Deep charcoal wall cladding provides an intensely moody backdrop that makes warm, unlacquered brass fixtures radiate with sculptural elegance. While polished chrome can read cold against dark slate or Nero Marquina slabs, living brass introduces organic depth, soft golden warmth, and bespoke charm. Over time, the unlacquered brass develops a subtle, natural patina that responds to touch and moisture, celebrating authenticity in the bathroom.
This high-contrast pairing shines in boutique-hotel-inspired primary suites where an intimate, cocooning atmosphere is desired. Pair large-format charcoal soapstone or matte graphite porcelain slabs with minimal grout lines to keep the background serene and uninterrupted. Against this dark canvas, a gracefully curved gooseneck shower arm or an ornate circular rain head becomes an intentional focal point.
Proper lighting is crucial in dark shower enclosures to prevent the space from feeling cave-like. Install a discreet vertical grazing light along a side wall to pick up the natural veining of the stone while casting a warm 2700K reflection across the brass hardware. Avoid the mistake of using high-gloss black tile, which reveals water spotting and distracts from the quiet matte drama of the metals.
To tie the room together seamlessly, echo the unlacquered brass in subtle architectural accents, such as the hinges of a frameless glass door or a minimalist shelf edge for bath essentials.
13. Radiant Heated Natural Stone Floors Extending Directly into the Shower Pan
Stepping onto cold stone diminishes the indulgence of a rain shower immediately. Extending an in-floor hydronic or electric radiant heating system directly under the shower pan transforms the tactile experience, ensuring your feet encounter soothing warmth from the moment you enter. Beyond superior comfort, heated shower floors accelerate evaporation between uses, keeping natural stone drier and naturally resisting mildew formation.
This feature works best in expansive wet rooms and open-concept walk-in enclosures where open drafts can otherwise lower room temperature. Select honed limestone, tumbled travertine, or quartzite with a tactile, honed finish that provides natural slip resistance underfoot. A neutral palette of warm oatmeal, creamy travertine, or pale sandstone creates an earthy, grounded sanctuary feel.
Lighting should accentuate the organic textures underfoot. Concealed floor-grazing step lights or low-voltage LED strip lights tucked beneath a floating bench highlight the cleft and grain of the heated stone. A common installation error is failing to use a dedicated waterproof radiant heating mat engineered specifically for continuously wet shower pans, or placing temperature sensors in the dry zone rather than the wet zone.
For an elevated, hammam-inspired design, extend the heating coils up a built-in floating shower bench so you can sit comfortably under the gentle downpour of warm water.
14. Full-Height Architectural Niche with Recessed Waterproof Glow Accents
Replacing haphazard wire caddies with a full-height architectural niche creates deliberate storage that doubles as a graphic design feature. Running a niche vertically from floor to ceiling—or horizontally across the full length of the main wall—creates strong architectural lines that anchor the rain shower layout. Inset waterproof warm LED strip lighting tucked behind an upper reveal bathes the niche in a soft, ambient glow that elevates daily amenities into curated decor.
This element works best in clean-lined contemporary bathrooms where visual clutter disrupts the spa atmosphere. Line the back of the niche with a contrasting texture, such as fluted stone, zellige tile, or bookmatched marble, while matching the surrounding return edges cleanly to the main shower wall. An earthy neutral palette of soft taupe, bone white, or warm concrete keeps the illuminated recess tranquil rather than aggressive.
Ensure the integrated lighting uses an IP67-rated waterproof diffused extrusion with a warm 2400K to 2700K color temperature to avoid cold commercial glare. A frequent misstep is making the niche shelves too shallow to hold high-end, pump-style shampoo bottles or failing to pitch the stone shelf forward one-sixteenth of an inch to shed standing water.
For an uncompromising luxury aesthetic, decant all bath essentials into matching amber or ceramic dispenser bottles to keep the lit display cohesive and serene.
15. Symmetrical Double Rain Shower Heads for an Expansive Shared Master Suite
A symmetrical double rain shower configuration is the hallmark of grand primary suite design, offering equal personal sanctuaries for two without competing for water coverage. Positioning twin ceiling-mounted rain heads in balanced alignment creates an immediate sense of classical order and grandeur. Each bather enjoys an independent microclimate with tailored water temperatures and spray pressures, eliminating compromise from shared morning rituals.
This layout requires a generous enclosure measuring at least six by eight feet to allow adequate separation between the water zones. Center the dual fixtures over individual drain points or a unified central linear drain. Use timeless materials like polished Calacatta Viola marble slabs or soft plaster walls paired with brushed bronze or polished nickel fittings to amplify the symmetry.
Lighting should reflect this disciplined balance. Place identical waterproof recessed spotlights directly over each rain fixture on independent dimmer circuits, paired with twin perimeter wall sconces outside the glass entry. The most significant mistake in dual-head installations is relying on an undersized standard hot water tank; running two high-flow rain heads simultaneously requires a dedicated tankless water heater and commercial-grade three-quarter-inch piping to maintain pressure and heat.
To complete the space, incorporate matching floating stone benches or recessed niches on either side of the enclosure to give each station an organized, private identity.
16. Seamless Microcement Wet Room for an Organic Minimalist Retreat
For an organic, monastic aesthetic, a seamless microcement wet room strips away grout lines entirely in favor of velvety, hand-troweled texture. Microcement flows uninterrupted across floors, walls, and curved ceiling junctions, creating a unified architectural envelope that feels warm and enveloping. Under an overhead rain shower, water glides naturally down the sealed, subtly mottled plaster finish, evoking the raw beauty of natural stone grottos.
This treatment excels in Japandi, Scandinavian, and contemporary Mediterranean master baths where visual simplicity and tactile richness take precedence over ornate stone. Earthy, pigment-dyed tones—like chalky linen, desert sand, or warm clay—provide an organic backdrop that softens hard surfaces. Install a matte black or weathered gunmetal rain head flush against the ceiling to preserve the uninterrupted curve of the plasterwork.
Lighting must be soft and directional. Grazing light sources from a hidden ceiling pocket highlight the delicate variations and trowel marks in the microcement without revealing imperfections. A common mistake is skimping on the multi-layered polyurethane sealing process; without proper waterproof sealing and regular maintenance, standing water can gradually stain the mineral surface.
Finish the space simply with a monolithic fluted travertine stool and a small bunch of hanging eucalyptus to create an authentic, serene sensory escape.
Integrated Steam Shower Conversion with Flush-Mounted Rain Discharge
Transforming your daily routine into a private wellness sanctuary begins with an integrated steam shower. This design is exceptionally suited for enclosed, fully insulated primary suites where the ceiling is sealed and sloped to prevent condensation buildup. By choosing a flush-mounted rain discharge head, you create a seamless, minimalist ceiling plane that allows the architectural beauty of your finishes to take center stage. This setup works beautifully with large-format porcelain slabs or bookmatched marble, minimizing grout lines and maximizing the clean, expansive feel of a high-end boutique hotel spa.
To style this elevated space, select a flush-mounted fixture in a sophisticated matte black or brushed warm brass finish that sits completely flat against the ceiling. Integrate vapor-tight, recessed LED chromotherapy lighting directly into the ceiling plane, allowing you to cycle through calming hues that enhance the steam experience. Soft, warm neutrals like cream, charcoal, or light gray stone tiles provide a soothing backdrop that feels both modern and timeless.
A common mistake to avoid in steam conversions is neglecting the slope of the ceiling; a subtle incline ensures that condensed water runs harmlessly down the walls rather than dripping cold droplets onto you during a warm steam session. For a designer-approved touch, install a digital thermostatic control panel just outside the glass enclosure, allowing you to pre-heat the steam and set your ideal rainfall temperature before ever stepping inside.
Moisture-Resistant Slatted Teak Ceiling Inset Around a Polished Chrome Head
To soften the cold, hard surfaces of stone and tile, introducing organic materials is an incredibly effective design strategy. A moisture-resistant slatted teak ceiling inset brings natural warmth, rich texture, and a sense of grounding to the shower space. This application works best in high-ceilinged modern rustic or coastal-inspired bathrooms, where the wood grain can contrast beautifully with sleek, contemporary fixtures. The natural oils in teak make it exceptionally durable in wet environments, offering an enduring luxury that ages gracefully over time.
For a striking visual contrast, pair the warm, honey-toned wood with an oversized, polished chrome rain shower head mounted in the center of the inset. The brilliant, reflective finish of the chrome catches the light and emphasizes the rich texture of the surrounding wood slats. Enhance this architectural feature with indirect, warm LED cove lighting tucked behind the perimeter of the teak panel, casting a soft, ambient glow down the walls.
One common mistake is failing to provide adequate ventilation behind the wood slats, which can trap moisture and lead to mildew. Ensure there is a small gap for airflow and that the teak is treated with a high-quality marine-grade sealer. A designer tip is to carry the teak element elsewhere in the bathroom, such as a matching vanity front or a custom bench, to create a cohesive, curated aesthetic.
High-Arch Ceiling Drop Arm in Brushed Warm Bronze
For bathrooms with standard ceiling heights where a flush-mounted fixture is not feasible, a high-arch ceiling drop arm offers a dramatic, sculptural alternative. This elegant fixture extends gracefully from the ceiling, adding height, movement, and a sense of classic architectural grandeur to the space. It is particularly effective in transitional or modern classic bathrooms, where the soft curves of the hardware can break up the rigid, linear lines of standard tile installations.
Styling this look requires a finish that commands attention. Brushed warm bronze is an excellent choice, offering a muted, sophisticated metallic sheen that feels incredibly tactile. Pair this fixture with handmade zellige wall tiles in rich, earthy tones like olive green, terracotta, or deep navy. The irregular surfaces of the tiles will catch the light and complement the soft curves of the bronze arm. Keep the lighting low-glare and focused, using directional downlights to highlight the metallic finish without creating harsh reflections.
When installing a drop arm, a common mistake is choosing a length that hangs too low, which can restrict movement for taller users. Aim for the shower head to sit between 80 and 84 inches above the finished shower floor for optimal clearance and water dispersion. A favorite designer trick is to match the bronze finish of the shower arm to your vanity hardware and light fixtures, weaving a thread of understated luxury throughout the entire room.
Doorless Walk-In Wet Zone with an Extended Fixed Glass Deflector Fin
A doorless walk-in wet zone completely redefines the spatial dynamics of a bathroom, creating an open, airy, spa-like environment that visually expands the entire room. This layout works best in spacious primary bathrooms where a generous footprint allows for a dedicated wet room design. To maintain the open feel while containing water spray, an extended fixed glass deflector fin is a brilliant architectural solution. It provides a sleek, nearly invisible barrier that keeps the rest of the bathroom dry without closing off the shower.
To style this layout, use a single, floor-to-ceiling panel of ultra-clear, low-iron glass held in place by a minimalist matte black or brushed brass channel. Pair this with large-format slate or textured granite floor tiles to establish a grounded, organic foundation. Natural light streaming from a skylight or a high clerestory window enhances the open-air feeling, while subtle floor-level LED strip lights can guide the way during evening use.
A frequent mistake in doorless layouts is underestimating the splash zone, which can lead to cold drafts and wet bathroom floors. Ensure the glass deflector fin extends at least 36 to 48 inches from the shower wall, and verify that the floor is pitched correctly toward a high-capacity linear drain to prevent water from pooling. For an extra touch of luxury, treat the glass with a permanent hydrophobic coating to prevent water spots and keep the panel looking pristine.
Concealed Horizontal Body Sprays Calibrated to Complement Rainfall Overhead
For the ultimate multi-sensory hydrotherapy experience, integrating concealed horizontal body sprays with an overhead rain shower creates a fully immersive wellness retreat. This setup is ideal for homeowners focused on daily rejuvenation, muscle recovery, and a high-performance shower experience. By concealing the body sprays flush with the wall, you maintain a clean, uncluttered aesthetic that does not disrupt the visual flow of your tile work.
Select sleek, circular body sprays that sit flush against the wall, finished in matte black or brushed nickel to match your overhead rain head. Arrange them in a vertical column of three on the wall opposite the main glass panel, keeping them visually discreet. Pair this high-tech configuration with clean, light-colored walls like white marble or light gray quartzite to keep the space feeling bright and energized. Dimmable, cool-toned LED lighting can enhance the crisp, water-focused atmosphere.
A common mistake with body sprays is installing them at incorrect heights, resulting in water spraying directly into the face or eyes. Calibrate the sprays to target key muscle zones: the shoulders, lower back, and thighs. Additionally, ensure your home’s plumbing lines and water heater can handle the high-volume demand of simultaneous overhead and horizontal flows. A professional designer tip is to use a thermostatic valve system, allowing you to control the temperature and flow of each water source independently.
Moody Smoked Glass Enclosure Offering Elevated Privacy and Contrast
If you want to make a bold, sophisticated statement, a moody smoked glass enclosure offers an exquisite blend of privacy, contrast, and high-end drama. This design works exceptionally well in contemporary urban apartments or moody primary suites, where it breaks away from traditional clear glass to create an intimate, cocoon-like showering experience. The dark, tinted glass filters light beautifully, adding an air of mystery and refinement to the bathroom.
Style this look with minimal, matte black hardware to keep the focus on the rich tone of the smoked glass. Inside the enclosure, use dark, textured materials such as charcoal terrazzo, Nero Marquina marble, or dark basalt tiles to enhance the moody aesthetic. To prevent the space from feeling too dark, integrate warm, dramatic spotlighting inside the enclosure. This highlights the glistening water droplets and creates a beautiful contrast against the dark glass panels.
A common mistake when using smoked glass is over-darkening the space, which can make the shower feel small or claustrophobic. Balance the dark tones by ensuring there is a source of natural light nearby, or keep the ceiling painted in a light, reflective finish. A designer-approved tip is to introduce brushed brass or copper fixtures inside the enclosure; the warm metallic tones will pop brilliantly against the dark, moody background.
Sculptural Curved Enclosure Wall with a Focused High-Volume Dropper
Introducing a sculptural curved enclosure wall is an exceptional way to bring soft, organic architectural lines into a space that is typically defined by hard angles. This design works best in large, open-concept primary bathrooms where the shower can stand alone as a central architectural feature. The curved wall wraps around the bather, creating a sense of shelter and tranquility that enhances the soothing nature of a rain shower.
To highlight the curve, clad the wall in flexible materials like mosaic finger tiles, fluted stone, or seamless micro-cement plaster in a soft, warm beige or plaster-white tone. Suspend a focused, high-volume circular rain dropper directly in the center of the curved space. Accentuate the architectural curve by installing a recessed LED light strip along the top perimeter of the wall, casting a soft, grazing light that highlights the texture of the plaster or tile.
When designing a curved wall, a common mistake is attempting to use large-format tiles, which results in awkward, jagged joints and spoils the smooth, organic line of the curve. Stick to seamless plaster finishes or small-scale mosaics that can wrap effortlessly around the radius. For a designer-worthy finish, position a matching curved bench inside the enclosure, allowing you to sit and fully enjoy the immersive, high-volume rainfall experience.
Frequently Asked Questions
Do luxury rain showers have good water pressure, or is the flow too weak?
Traditional rain showers mimic a gentle, natural downpour, prioritizing broad coverage over intense pressure. However, modern luxury rain shower ideas solve this by incorporating advanced air-injection technology, which mixes air with water to create fuller, more pressurized droplets. If you prefer a stronger rinse, look for fixtures with adjustable spray patterns or dual-source configurations that pair the overhead rain head with a high-pressure handheld wand or wall-mounted body sprays. This setup gives you the best of both worlds: a soothing, immersive soak and a powerful stream when you need it.
What is the ideal ceiling height for installing a ceiling-mounted rain shower?
For the ultimate luxury rain shower experience, the ideal height for the showerhead is between 80 and 84 inches from the shower floor. If your ceilings are standard, a flush-mount or short ceiling-arm installation works beautifully. For exceptionally high ceilings, a longer suspended extension arm is necessary to prevent the water from cooling down or dispersing too much before it reaches you. Always consult with your plumbing professional during the rough-in phase to ensure the pipe drops at the perfect height for your household.
Do I need a special drainage system for a high-volume rain shower?
Yes, drainage is a critical consideration. High-end rain showerheads—especially multi-function panels or double systems—discharge a significantly higher volume of water per minute than standard fixtures. To prevent pooling and ensure a seamless look, you should pair your luxury setup with a high-capacity linear drain. Installing a wall-to-wall linear drain not only handles the water volume effortlessly but also allows for a single-slope floor, which is essential for achieving a clean, curbless walk-in aesthetic.
Will upgrading to a luxury rain shower require a larger water heater?
It very well might. Because luxury rain showers encourage longer, more relaxing sessions and often feature larger heads with higher flow rates, they consume more hot water. If you are planning a system with multiple body sprays or dual heads, your standard tank heater may struggle to keep up. We highly recommend upgrading to a high-capacity tankless water heater. This ensures an endless supply of hot water on demand, allowing you to fully enjoy your spa-like retreat without worrying about running cold mid-lather.
How do I keep a large, doorless walk-in rain shower from feeling drafty?
Draftiness is a common issue in spacious, open-concept wet rooms. To keep the space warm and cozy, we recommend installing radiant underfloor heating that extends directly into the shower pan. Additionally, proper ventilation design is key; position your exhaust fan so it clears steam without creating a direct breeze over the showering area. Using a fixed glass deflector fin or a curved architectural wall can also help trap the warm steam and block cool bathroom drafts while maintaining an open, airy aesthetic.
How do I prevent limescale buildup on a large luxury rain shower head?
Hard water can quickly clog the delicate nozzles of a rain shower, disrupting the perfect rainfall pattern. To prevent this, look for fixtures featuring rub-clean silicone nozzles, which allow you to easily wipe away mineral deposits with your fingertip. For long-term protection and to keep your high-end finishes looking pristine, installing a whole-house water softener is the best investment. It protects your plumbing, prevents water spots on glass enclosures, and keeps your luxury shower operating at peak performance.
Conclusion
Designing a luxury rain shower is about more than just aesthetics; it is about creating a sensory, restorative experience that elevates your daily routine. By combining high-end fixtures like ceiling-recessed panels or unlacquered brass heads with thoughtful architectural elements—such as curbless entries, natural stone surrounds, and integrated ambient lighting—you can transform a standard bathroom into a sophisticated, spa-grade sanctuary.
If you are ready to bring these luxury rain shower ideas to life, there is no need to tackle a complete overhaul all at once. Start by selecting one or two key elements that resonate most with your personal style, such as upgrading to a dual-source fixture or adding a sleek glass enclosure. With careful planning and a focus on quality materials, you can confidently design a timeless wet room that brings the indulgent comfort of a boutique hotel directly into your home.